How To Paint Melamine Kitchen Cabinets
Painting your cabinets is an affordable way to transform your kitchen without having to put in a new one. We have a fairly large kitchen, but the layout worked for us so we decided to upcycle the cabinets, change the hardware, replace worktops and add a new splashback. The existing kitchen was, at least, 15 years old, but in great condition. A couple of the doors (underneath the sink) were water damaged. I managed to sand the damaged areas so that, once the paint was on, you couldn’t see the damage at all. Not only did I paint the cabinets in our own kitchen but, I also painted the cabinets in our holiday cottage, both of which are made of melamine aka laminate.
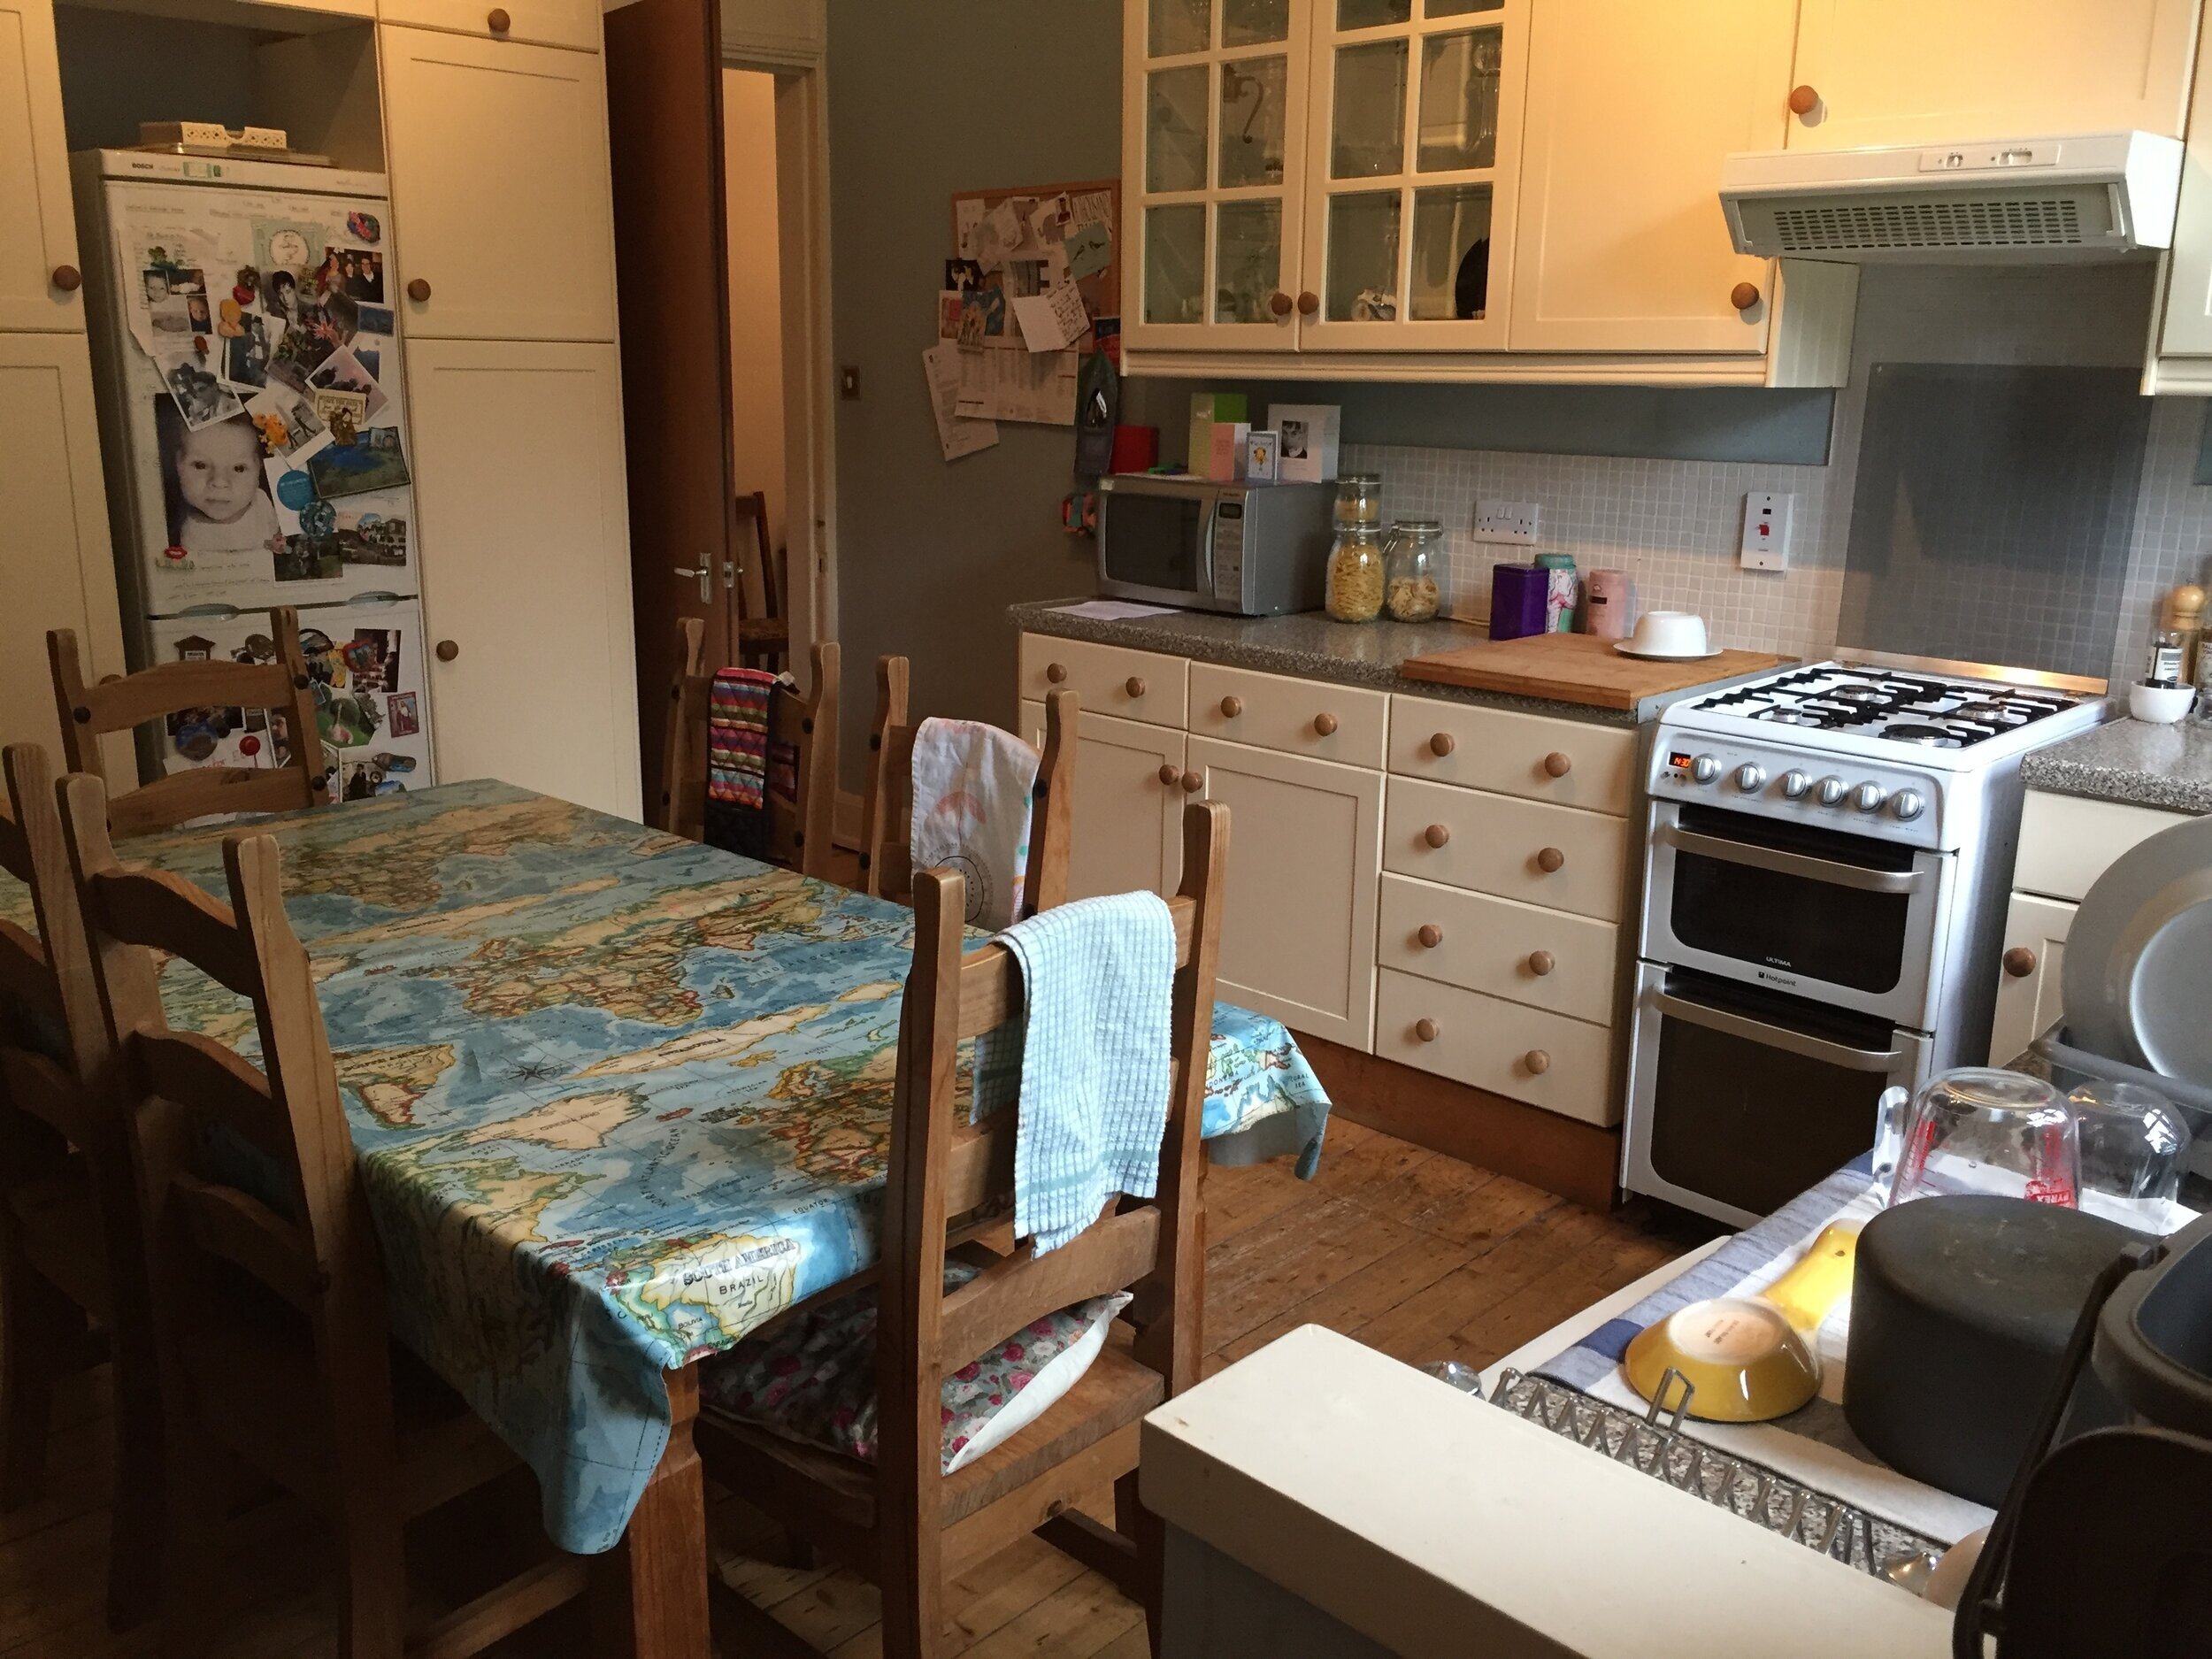
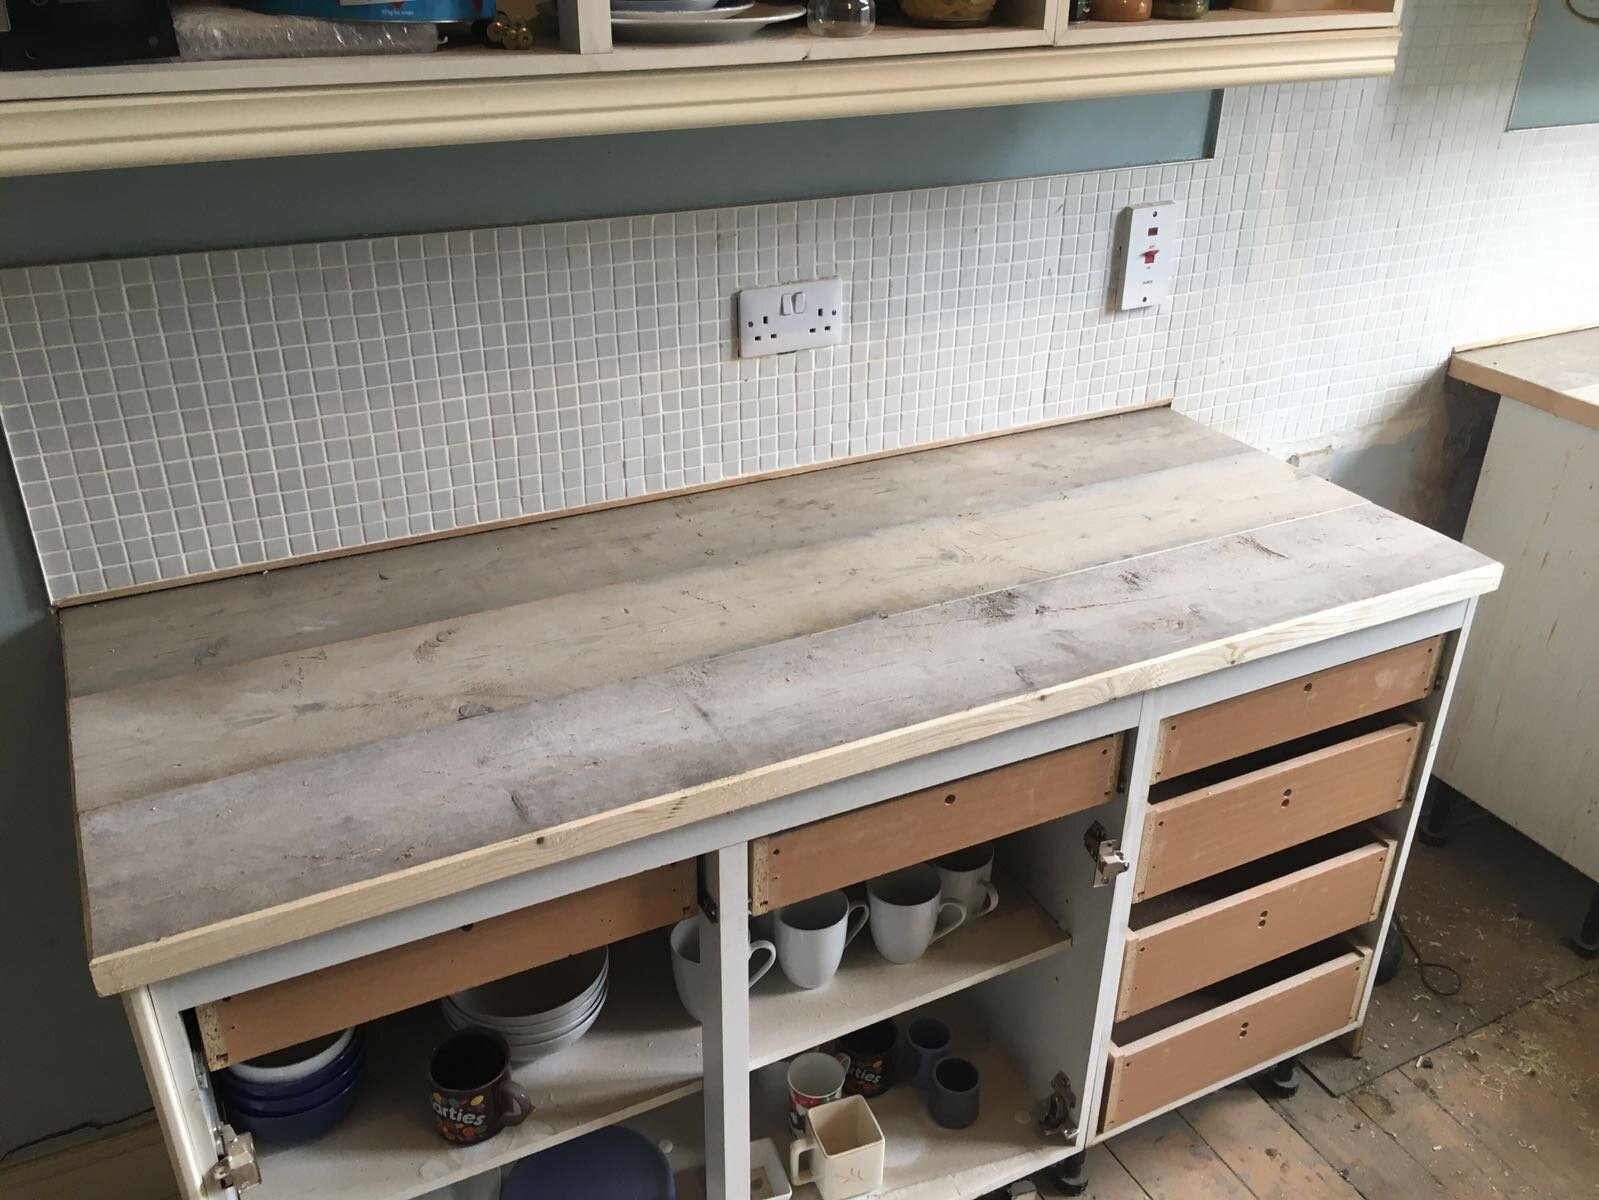
My Kitchen Before
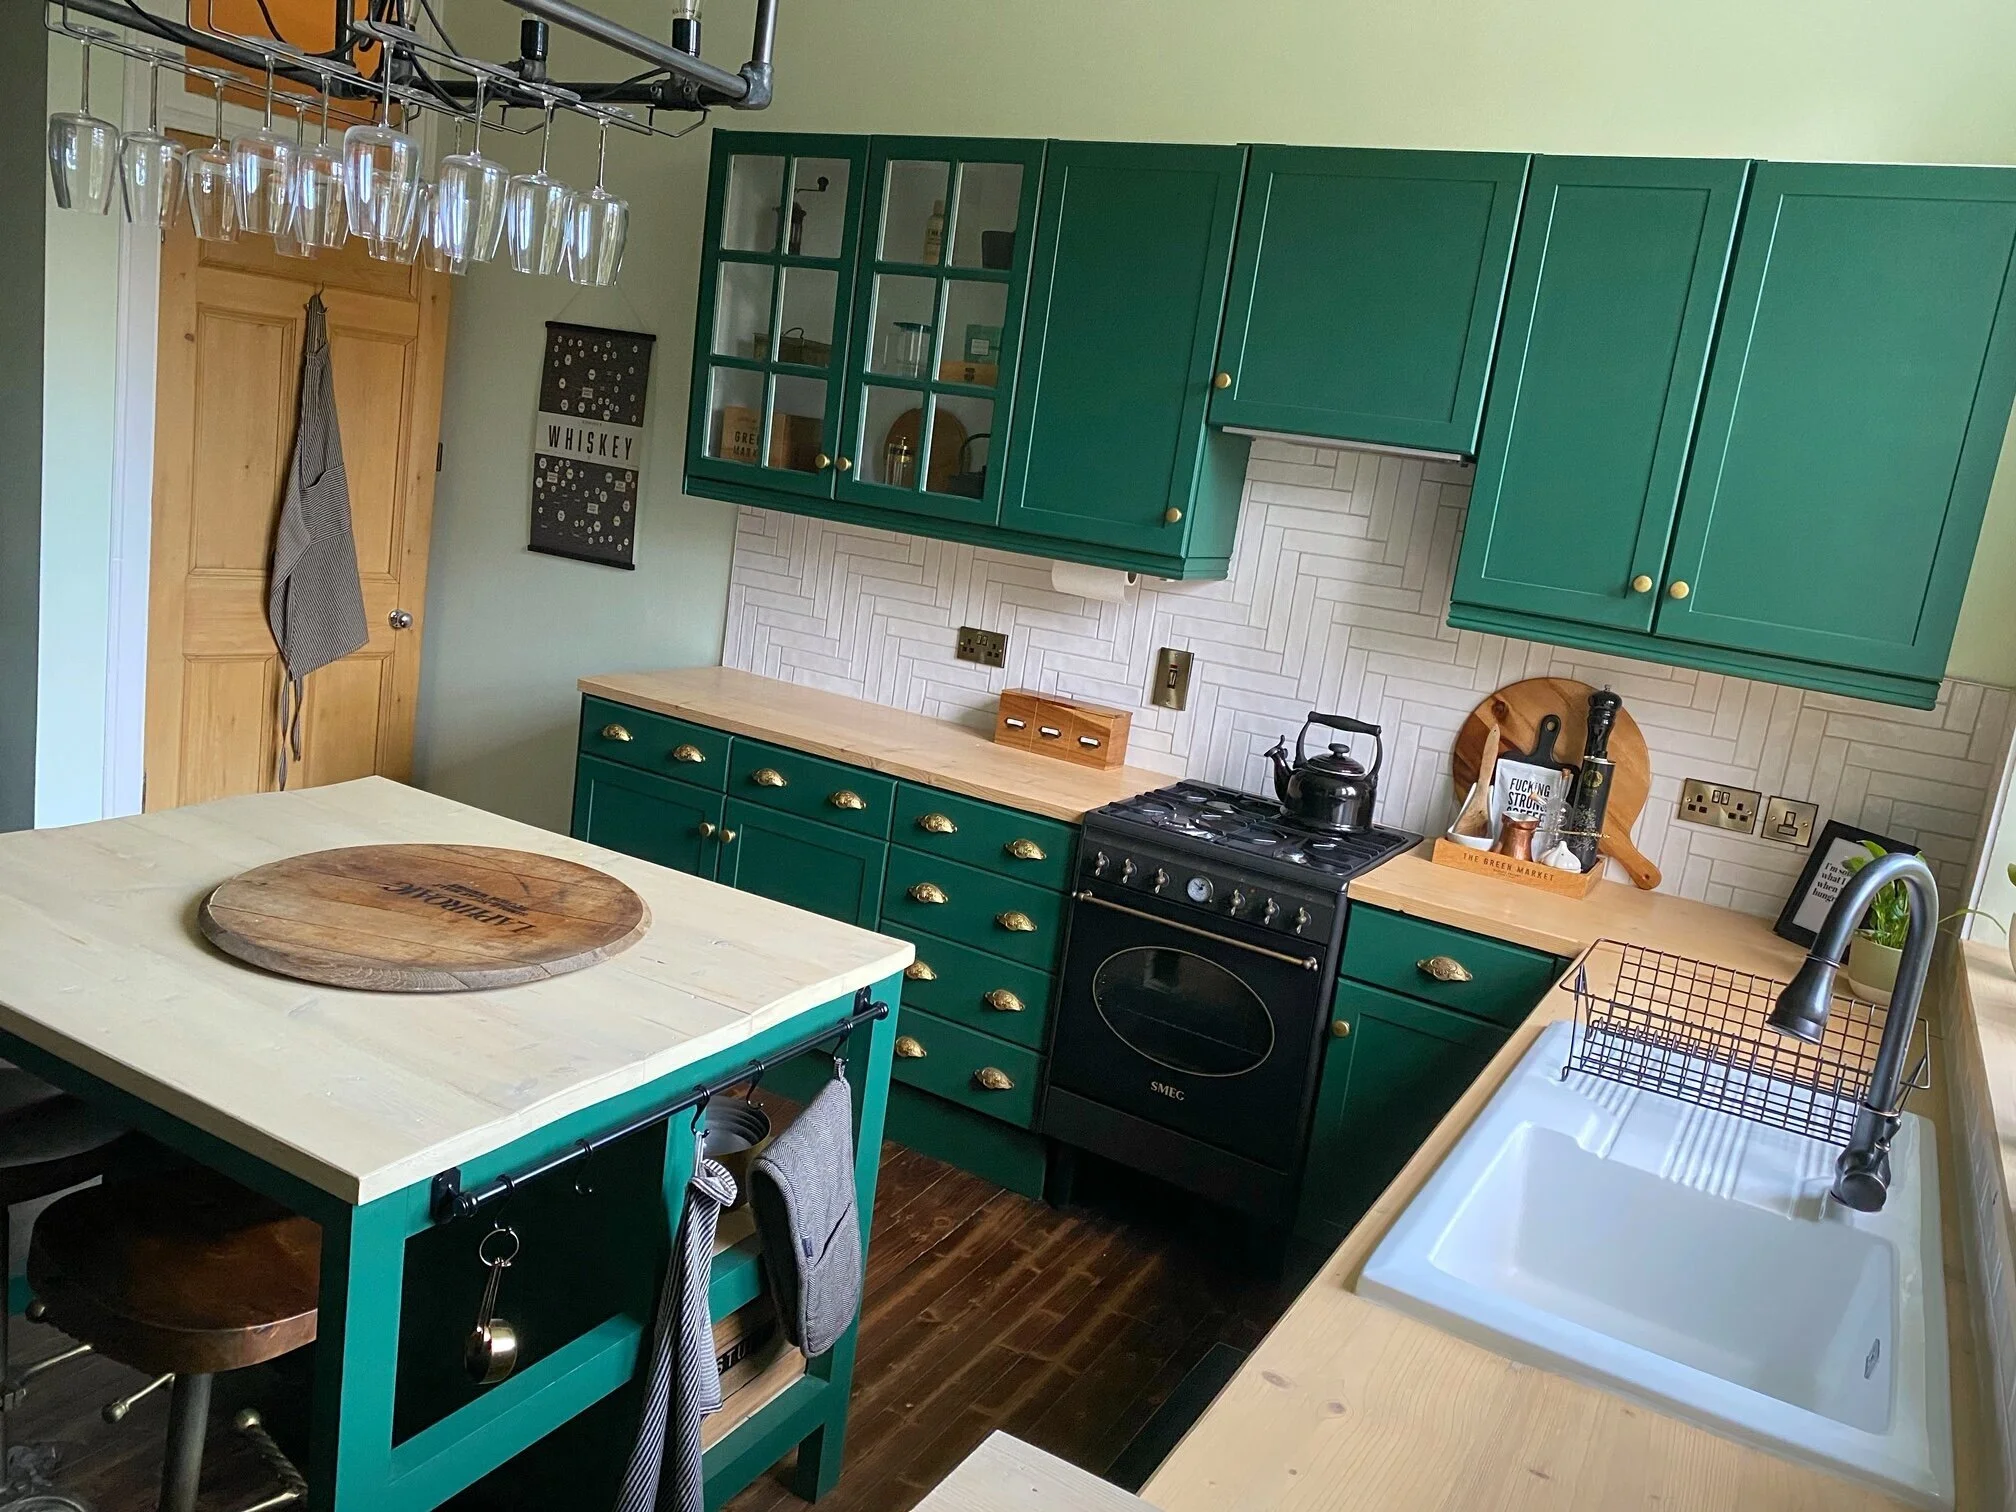
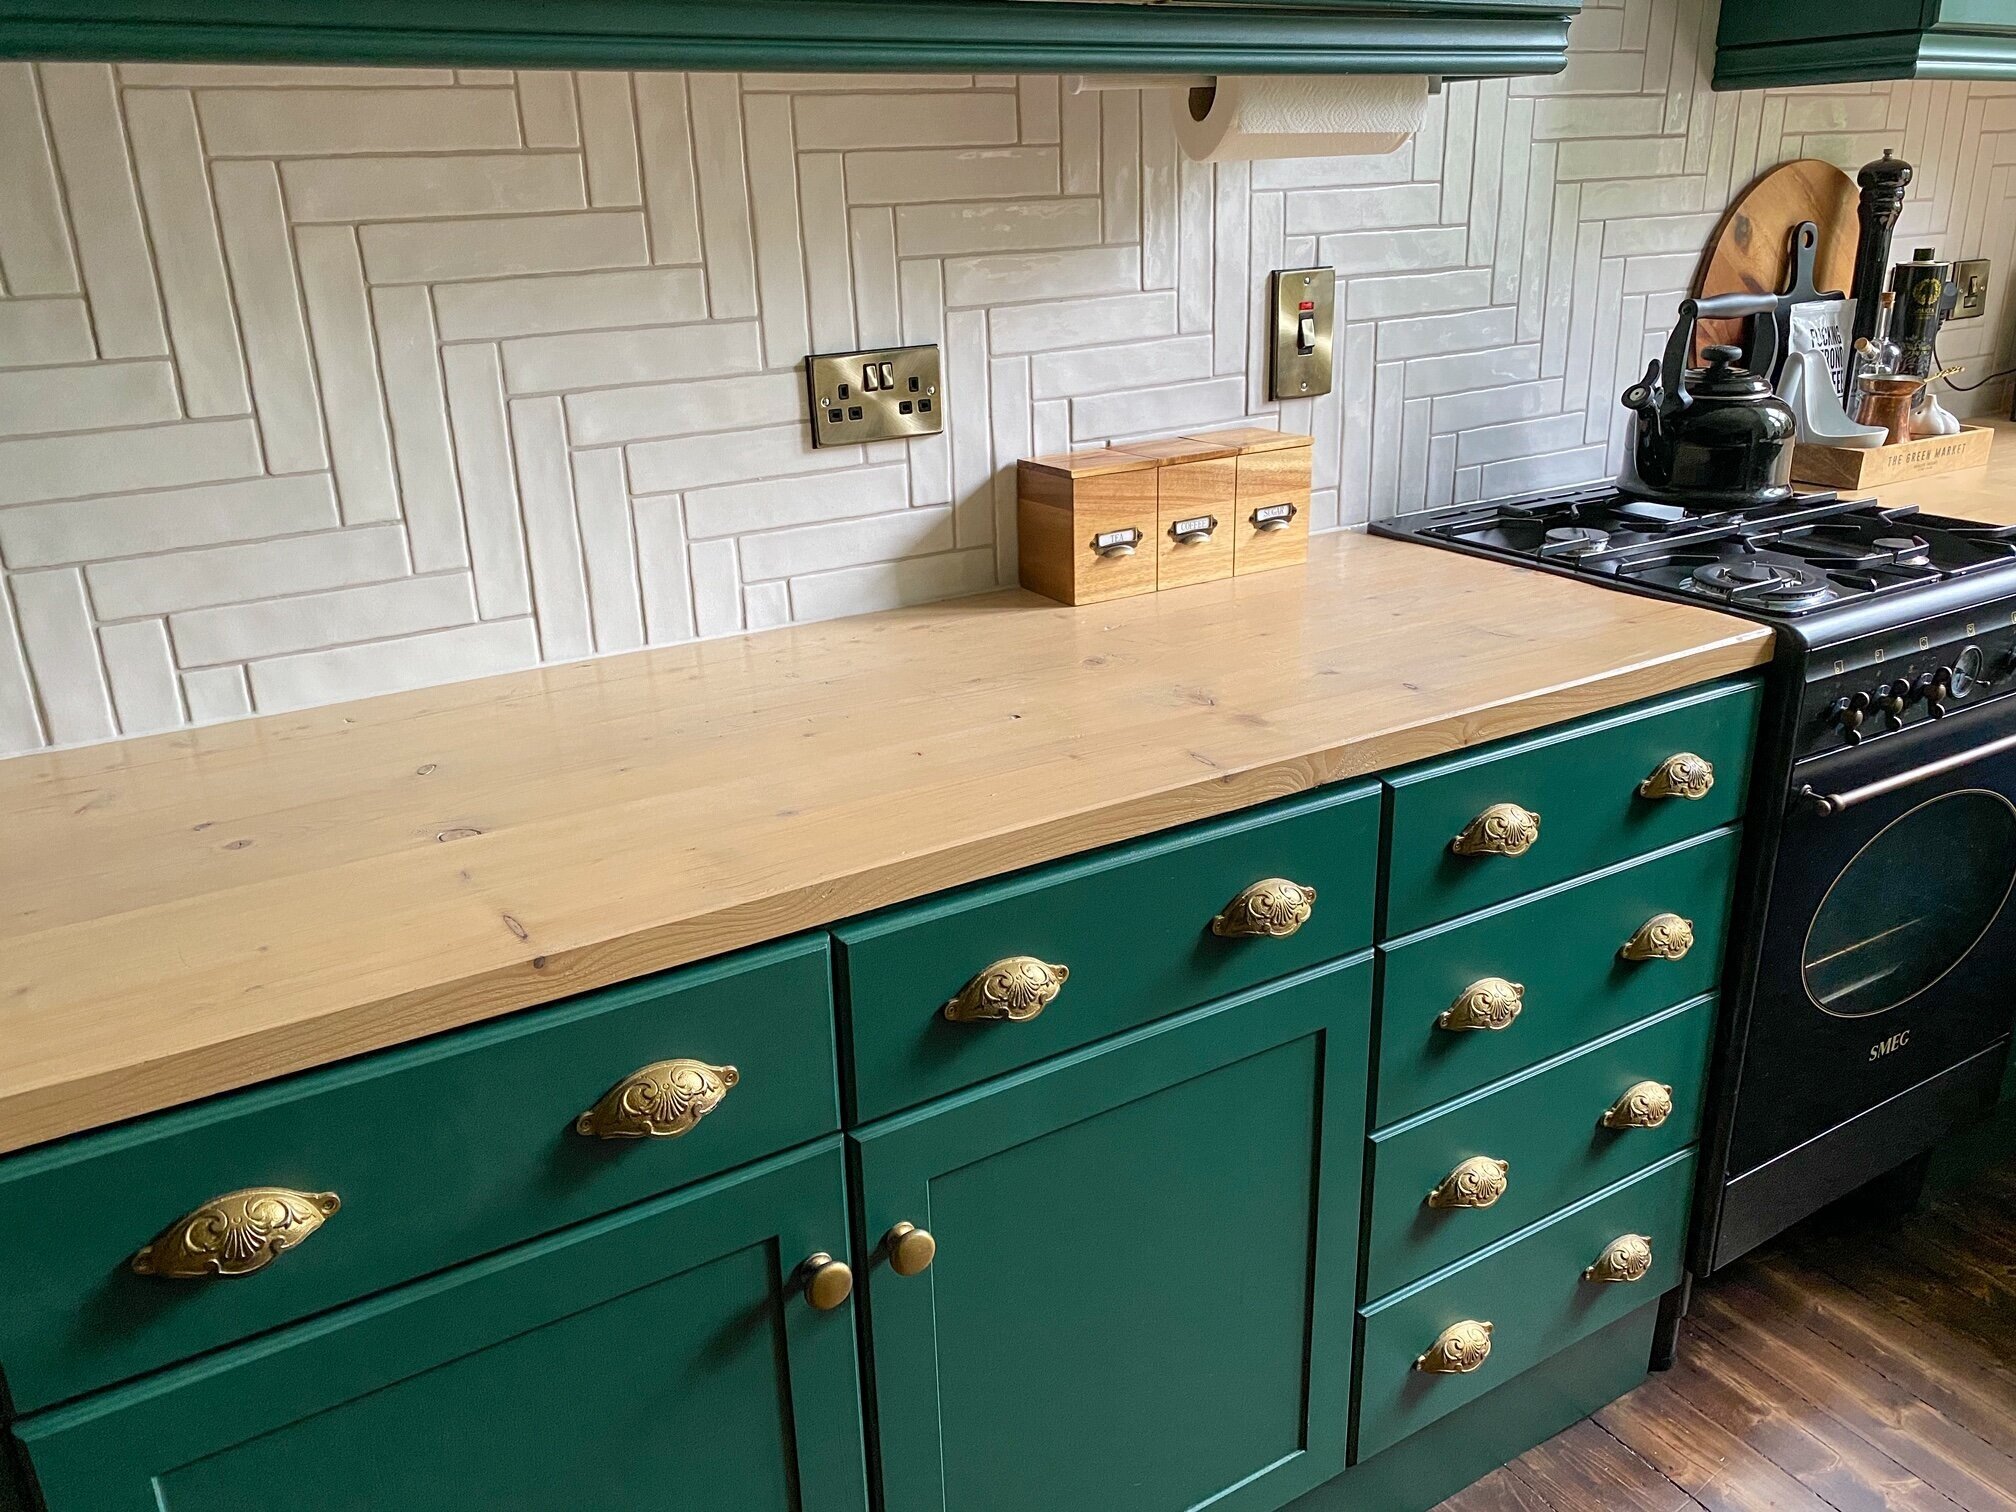
My Kitchen After
Disclaimer: depending on the size of your kitchen, this project is not for the faint-hearted!
Our kitchen renovation was based around making the biggest impact for the smallest cost. And honestly, my Balkan blood relishes a challenge like this! I would say the following are all justifiable reasons to paint your cabinets:
Budget restraints
If you have time on your hands
Your existing layout works but the style doesn’t
Your conscience – You don’t like waste
The upheaval involved in fitting a new kitchen is too disruptive
Even then, there’s still the option of paying a professional to paint it. So, unless you want one of those spaceship kitchens, there are so many reasons to upcycle what you already have. Keeping that in mind, it requires effort and stubbornness. Each drawer and cabinet door required four coats – one coat of surface prep solution and three coats of paint. And don’t forget the carcasses, side panels and kick boards.
Feeling determined and ready to graft? Great! Read on…
Below, I have included affiliate links to the materials I used (opens in new window) so you can add them straight to your basket.
You will need:
Eggshell paint
Drill or Screwdriver
New hardware (optional)
Masking tape (optional)
A sheet to protect the floor
Something to prop doors onto

Organisation
Start by unscrewing the hardware. Keep screws in a container so you don’t lose them. These could come in handy for your new hardware. Quite often, when you buy new handles, the screws can be too long or too short for your existing cabinets and drawers. So, by keeping the old screws, you’ll know that they fit in case the new ones don’t.
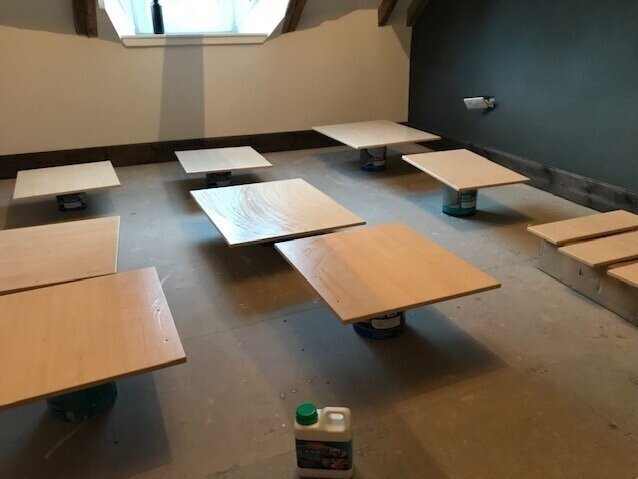
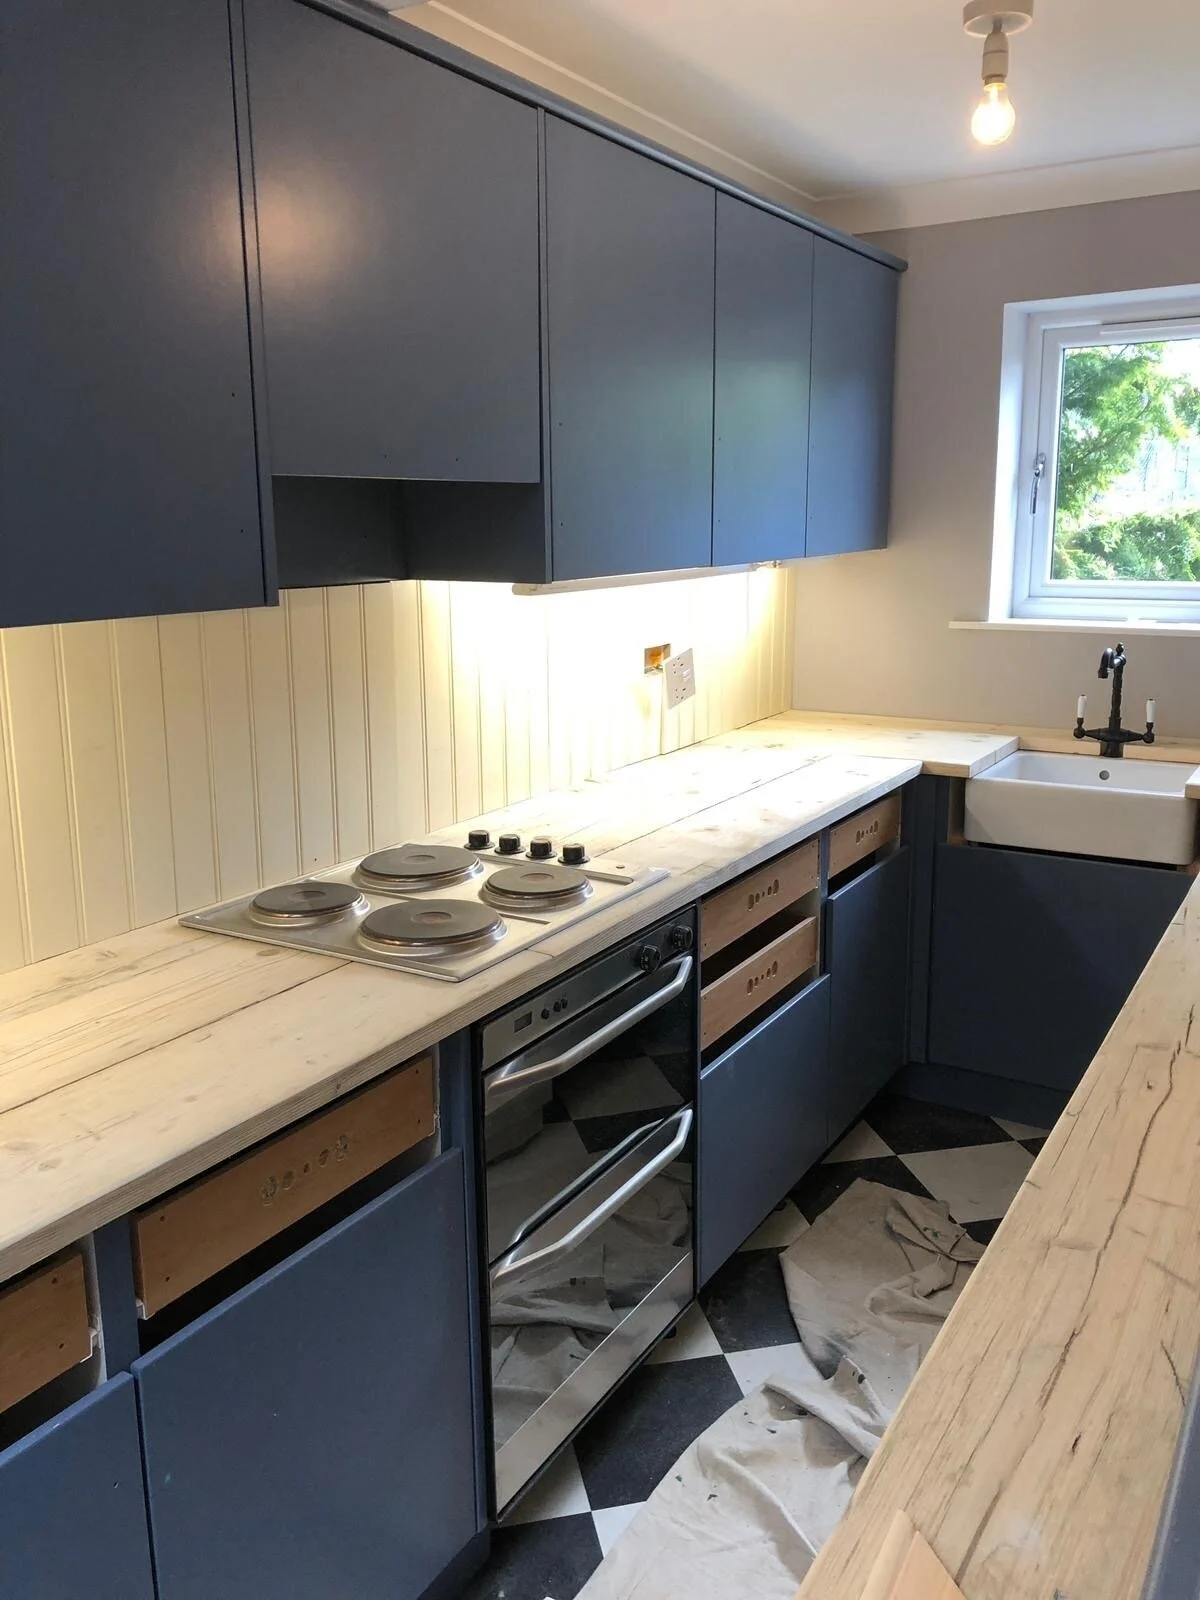
It’s up to you whether or not you want to prep all the surfaces whilst the doors and drawers are still attached. I took them all off first and then did the prep work. However, although the prep work is important, you don’t have to do it with precision, unlike the paintwork. If you do decide to take the doors and drawers off first then find a large space where you can lay them flat. Since the floors (in both houses) hadn’t yet been sanded, I didn’t put anything down to protect them, but a dust sheet or tarp would do the trick. Use some sort of props to lift them off the ground so you can get into the edges. I used paint tins. You can add grips or tack underneath to stop the doors from moving when you come to paint.
Take all the doors and drawers off and label them as you go i.e. use a pencil to mark each one with a number or letter so that when you come to re-hang them, you’ll be able to match them up easily. If you don’t want to mark your units then you can use a piece of masking tape, stick it to the unit and corresponding door and write on that instead. Store the brackets inside their respective unit.
If you want a clean finish then you can also use the masking tape on edges, shelves and any walls and floors surrounding the base. I didn’t do this, however, I did use masking tape on the two doors with glass panels.

Holiday Cottage Before
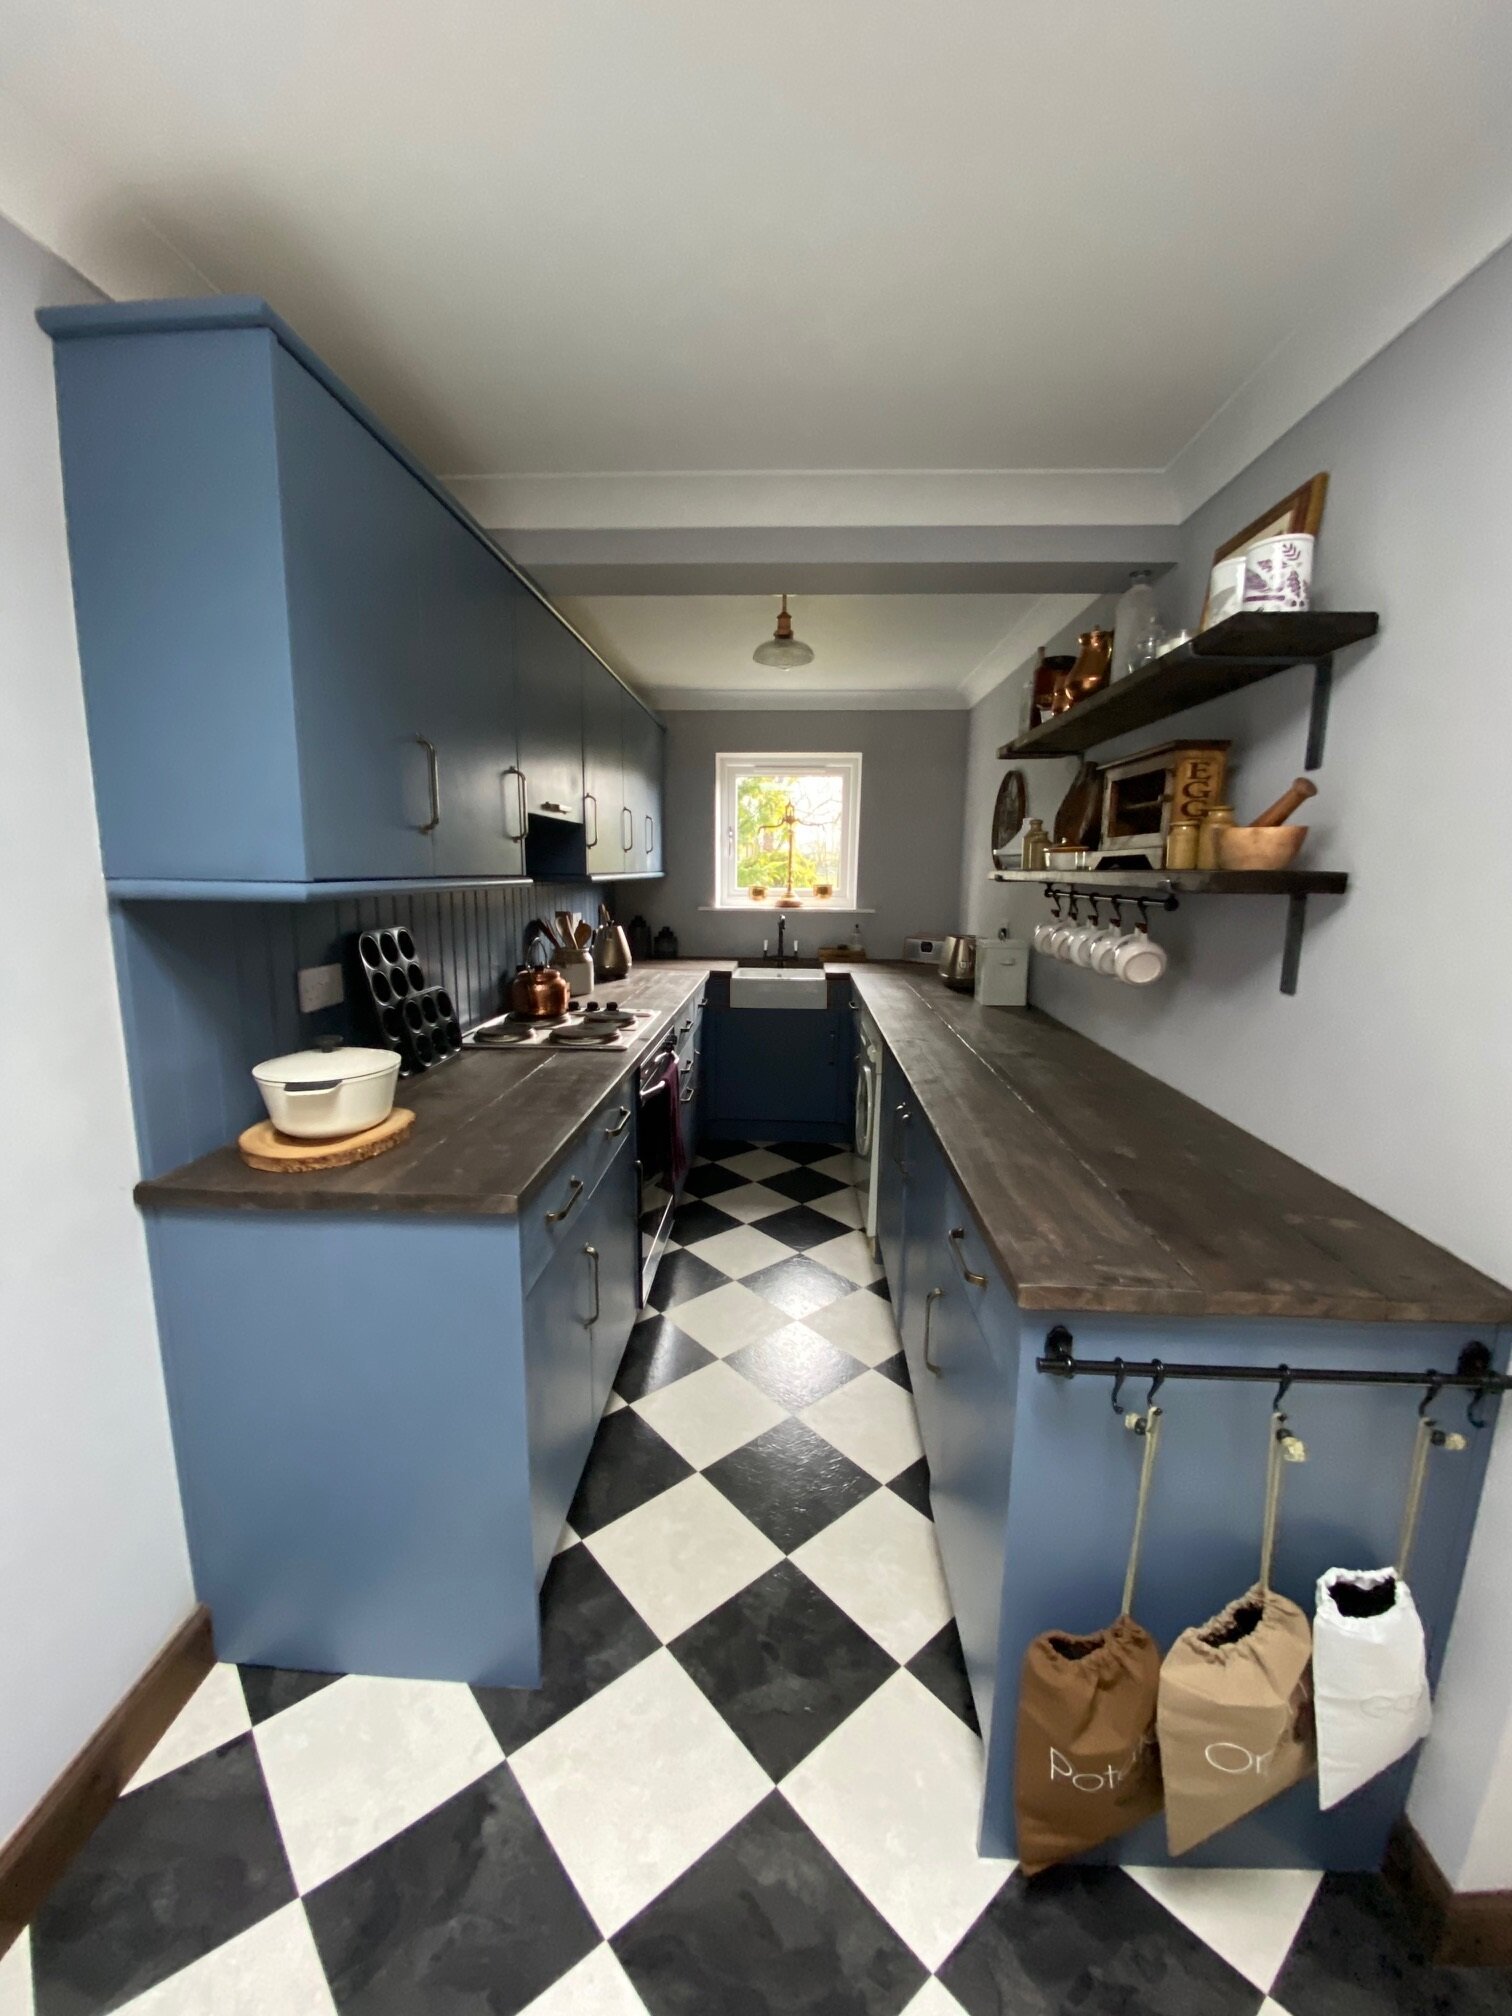
Holiday Cottage After
Preparation
It’s boring but necessary if you want a high-level finish that’s going to stand the test of time. This involves washing down existing cabinets, doors and drawers, especially in areas that accumulate a lot of dirt and grease like the kitchen. I like to use sugar soap. It comes in liquid or powder form. It’s not actually made out of sugar. It gets the name because, in powder form, it looks like granulated sugar. It’s just a solution which is particularly useful for preparing paintwork. Once it has been rinsed away, it doesn’t leave behind any residue, unlike regular cleaning products, that may hinder the adhesion of your new coat of paint. Simply dilute the liquid or powder in warm water and wipe everything clean with a cloth or sponge. Then, rinse with clean, warm water, again, with a sponge or cloth. Allow plenty of time for the surface to dry.
Next up, grab some sand paper and start sanding all surfaces that you intend to paint. A note to all perfectionists: Don’t spend too much time on this, just a rough once-over is sufficient. I like to use 120 grit sand paper, because it creates enough texture without scratching the surface. Sanding is a critical step in making sure the paint adheres. I used the same method for both our kitchen and the holiday cottage, but I forgot the sanding step for the holiday cottage and there have been some chips to the paintwork since. So, although sanding is very tedious, it’s a vital stage in the process.
Repeat the sugar soap step here. Surfaces have to be clean and dust free for the surface prep solution to affix properly. Once fully dry, apply the surface prep solution generously with a clean, dry, lint-free cloth. Leave to stand for 5 minutes then lightly wipe over the surface (in one direction) with a clean cloth to remove any excess solution. Allow to dry for 2 hours. The solution leaves a surface for paint to bond to, it’s odourless, adheres to most surfaces and can be coated with any type of paint. Although the solution is supposed to be an alternative to sanding, I still recommend sanding first. I used the solution because it’s particularly effective on melamine surfaces. If you have real wood cabinets then you can use primer instead.


Painting
Make sure you shake or stir your paint first. I used Johnstone’s Trade Acrylic Durable Eggshell which provides a low odour, is quick drying and resistant to condensation and regular cleaning, ideal for kitchens! Use a foam brush to paint detailed sections, such as, the edges of each cabinet base, door and drawer. Use a foam roller for bigger sections, such as, door and drawer fronts and side panels. Foam brushes and rollers help prevent streaks and drips, so they are ideal for use with eggshell paint, which dries really quickly. I didn’t paint inside the cabinets or on the reverse side of the doors. I painted the edges of the cabinets because, even when the doors were closed, you could see a slither of white between the cracks. However, I think if I had painted inside the cabinets then those areas would definitely be more prone to chipping.
Follow the instructions based on the paint you buy. For me, by the time I had first coated everything, it was dry and ready for a second coat and so on. I applied three coats of paint to everything. This gives a smooth, flat finish. Two years on, and the kitchen in my home is still chip free and rich in colour.

Before

After
Top Tips
If you don’t have room to lay out your doors on the floor then just stack them against a wall. Be sure to line between each one with a sheet of wax paper to avoid sticking or peeling.
Apply the paint lightly and in one direction. Try to work it quickly as any strokes applied as the paint is drying will leave brush marks. I learned the hard way so, it’s best to layer up the paint in coats and not worry too much about coverage on the first coat. I also experimented with brushes and found the foam ones to be the most forgiving.
Temperature and humidity can affect drying times. High heat can make your paint dry even faster and high humidity can slow down the process. If you’re working in your garden, for example, then take that into consideration. I wouldn’t even dream of taking a project like this outdoors in Scotland, especially when the heavens open without warning! Also, direct sunlight can make paint bubble, although, I’ve never had that problem up here!
Wrapping rollers and brushes in a plastic bag means you can take a break or even finish the job over several days without having to wash them between sessions. If you wrap them tightly enough, they will be as fresh as day one and ready to continue where you left off.
A side note on hardware: You may decide to keep your existing handles, in which case, store them safely. Or, you might decide to use something completely different. In which case, the holes may not line up anymore; your new handles might have holes for screwing through rather than threading. This was the case for my kitchen. The existing handles were round wooden knobs that were threaded through the drawer/ door. For the doors, I replaced like for like, but for the drawers, I used iron cup handles (which I spray painted brass). The cup handles had a hole on either side of them for fixing straight onto the front of the drawer. For perfect positioning, this meant that the existing hole would have been right in the middle of each cup and if you looked underneath it, you could see the hole. So, I simply filled the existing holes with Polyfilla, sanded them flat and once the paint was on, it looked flawless.

I would love to hear about your experience. If you’ve ever upcycled your own kitchen, let me know in the comments below.