Home Transformation - Kitchen Before and After

Before
The first decision we made was to keep the old kitchen. I liked the existing layout of the cabinets so I didn’t feel the need to rip out the kitchen to then put a new one in the exact same place. I decided that, since we were saving money on buying a kitchen, this warranted a splurge on appliances ;) The fridge and cooker weren’t available in the UK at the time we bought them (I’m not sure that they are now either) so we had them shipped from Italy. Ideally, I would buy from the UK but I find that sometimes we’re behind the times, compared to other countries. I remember trying to buy brass hardware years ago when chrome was the only option available. I’m sure you could get brass years ago but I wasn’t willing to give a kidney for it. I wanted the appliances to look like pieces of furniture rather than a big silver box and I wasn’t disappointed! These will go from home to home with us (providing we ever move). They’re like an interior tattoo; I would ink them onto myself and know I would never regret it.

During…
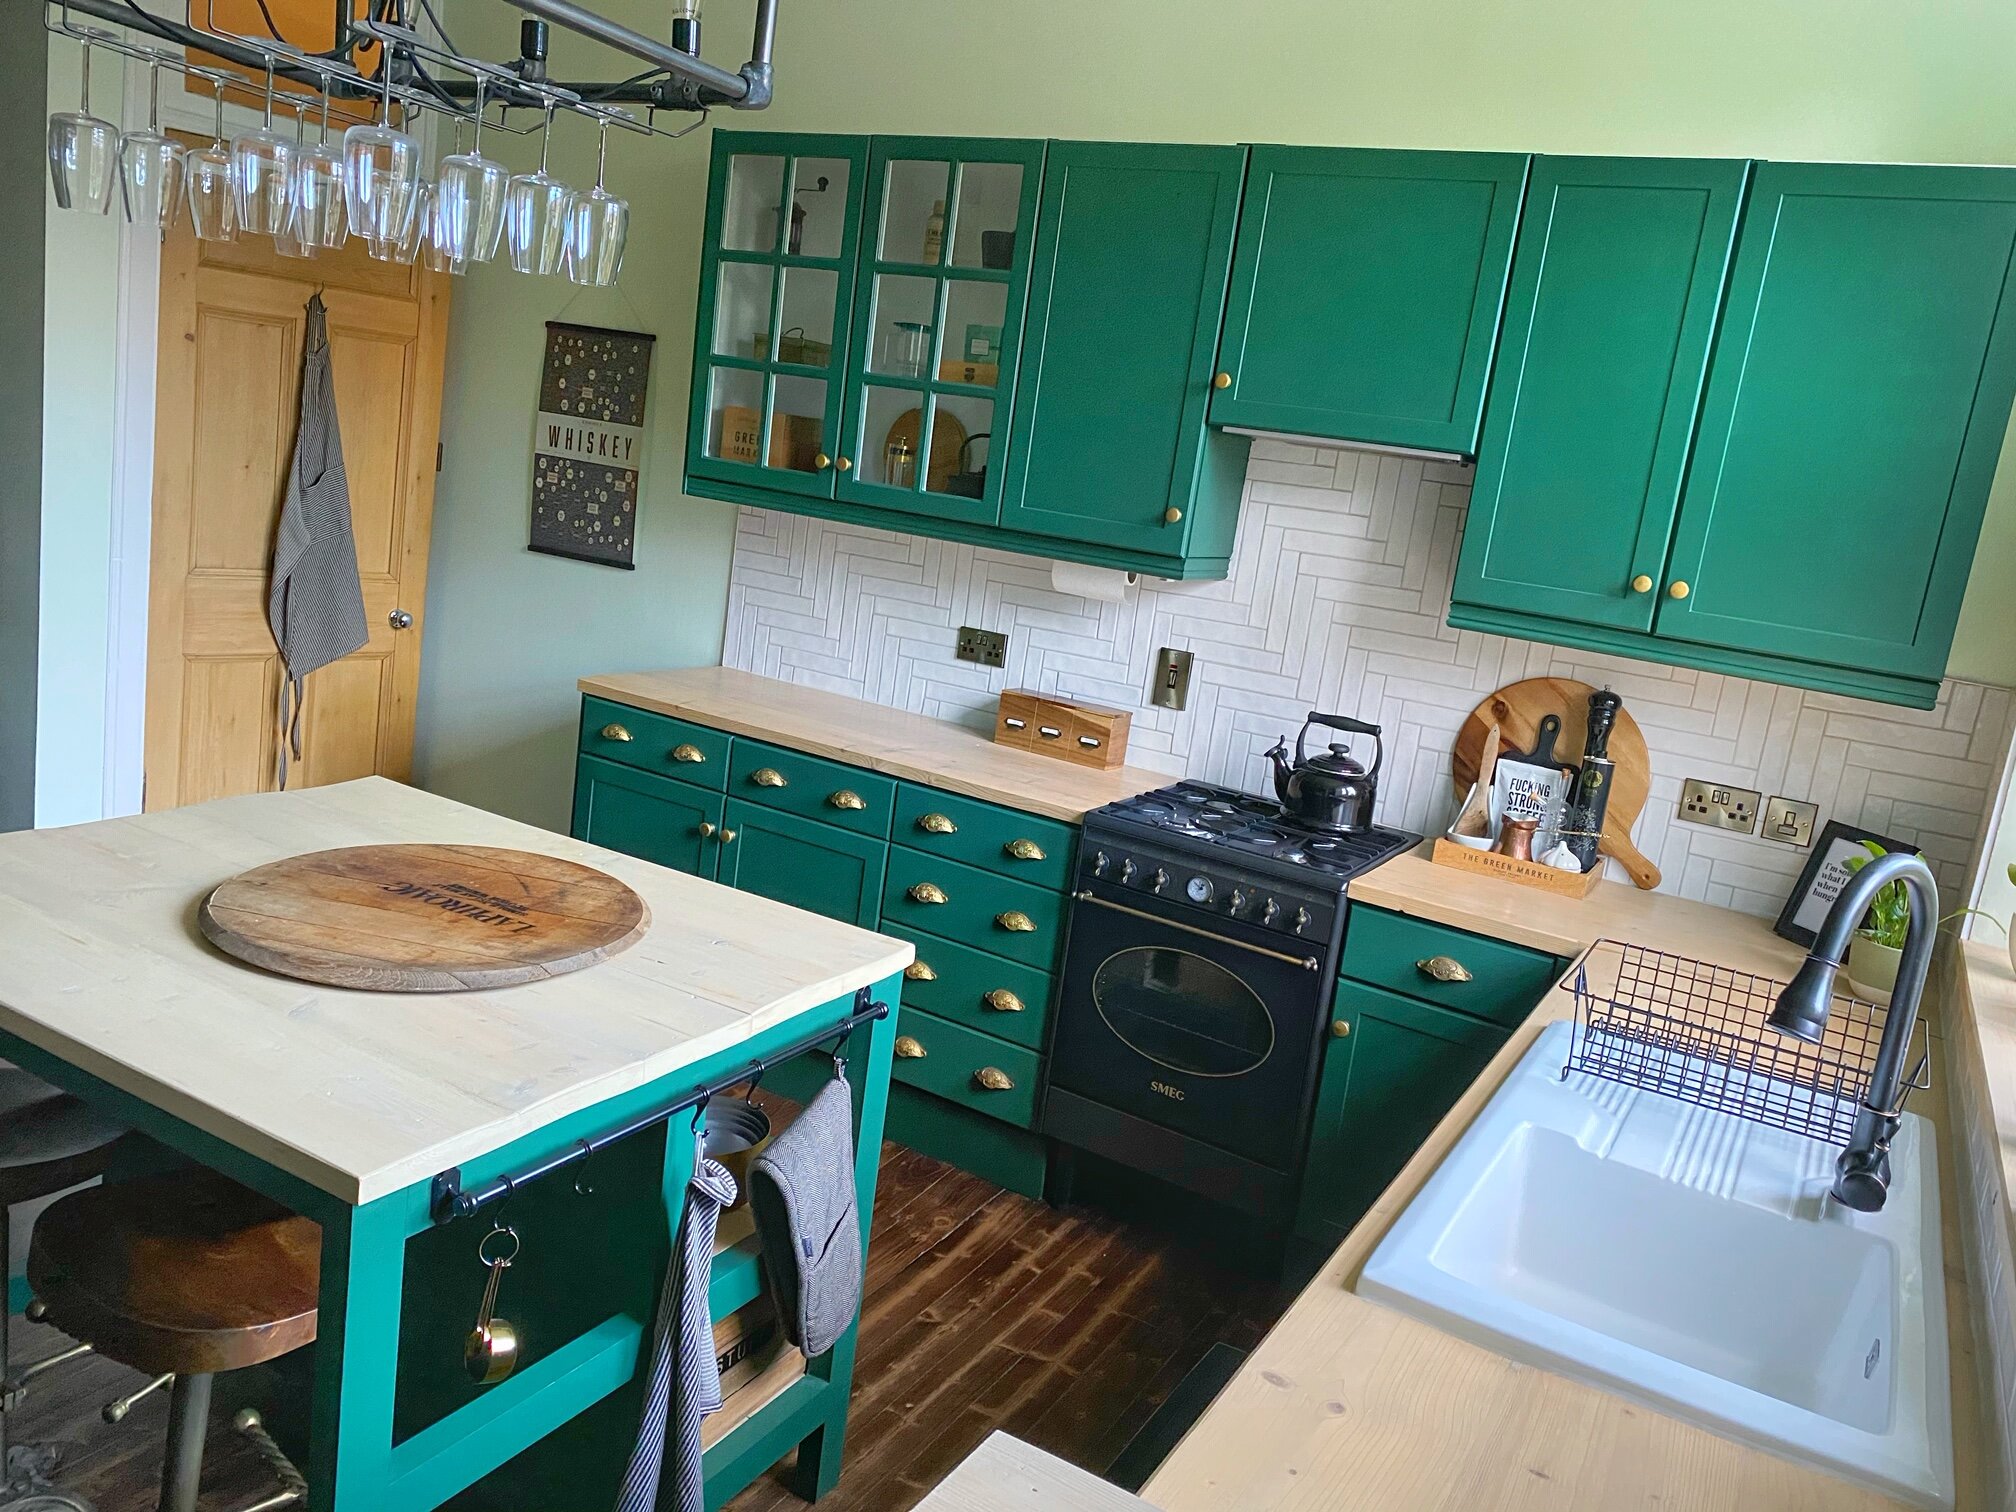
I painted the cabinets with this dark green eggshell paint. I took all the doors and drawers off to give them a clean and then a light sanding. I wiped down the carcasses and cleaned the inside of those too. The units are made of laminate, not wood, but you can still sand them lightly so that the paint sticks better. I coated them in a ‘surface prep’ solution, which is like a water based glue. I then applied three coats of eggshell paint. I used eggshell because it’s hard-wearing and wipe-able, perfect for a kitchen! We completed this project two years ago and the paint has never chipped or faded and still looks brand new!
After
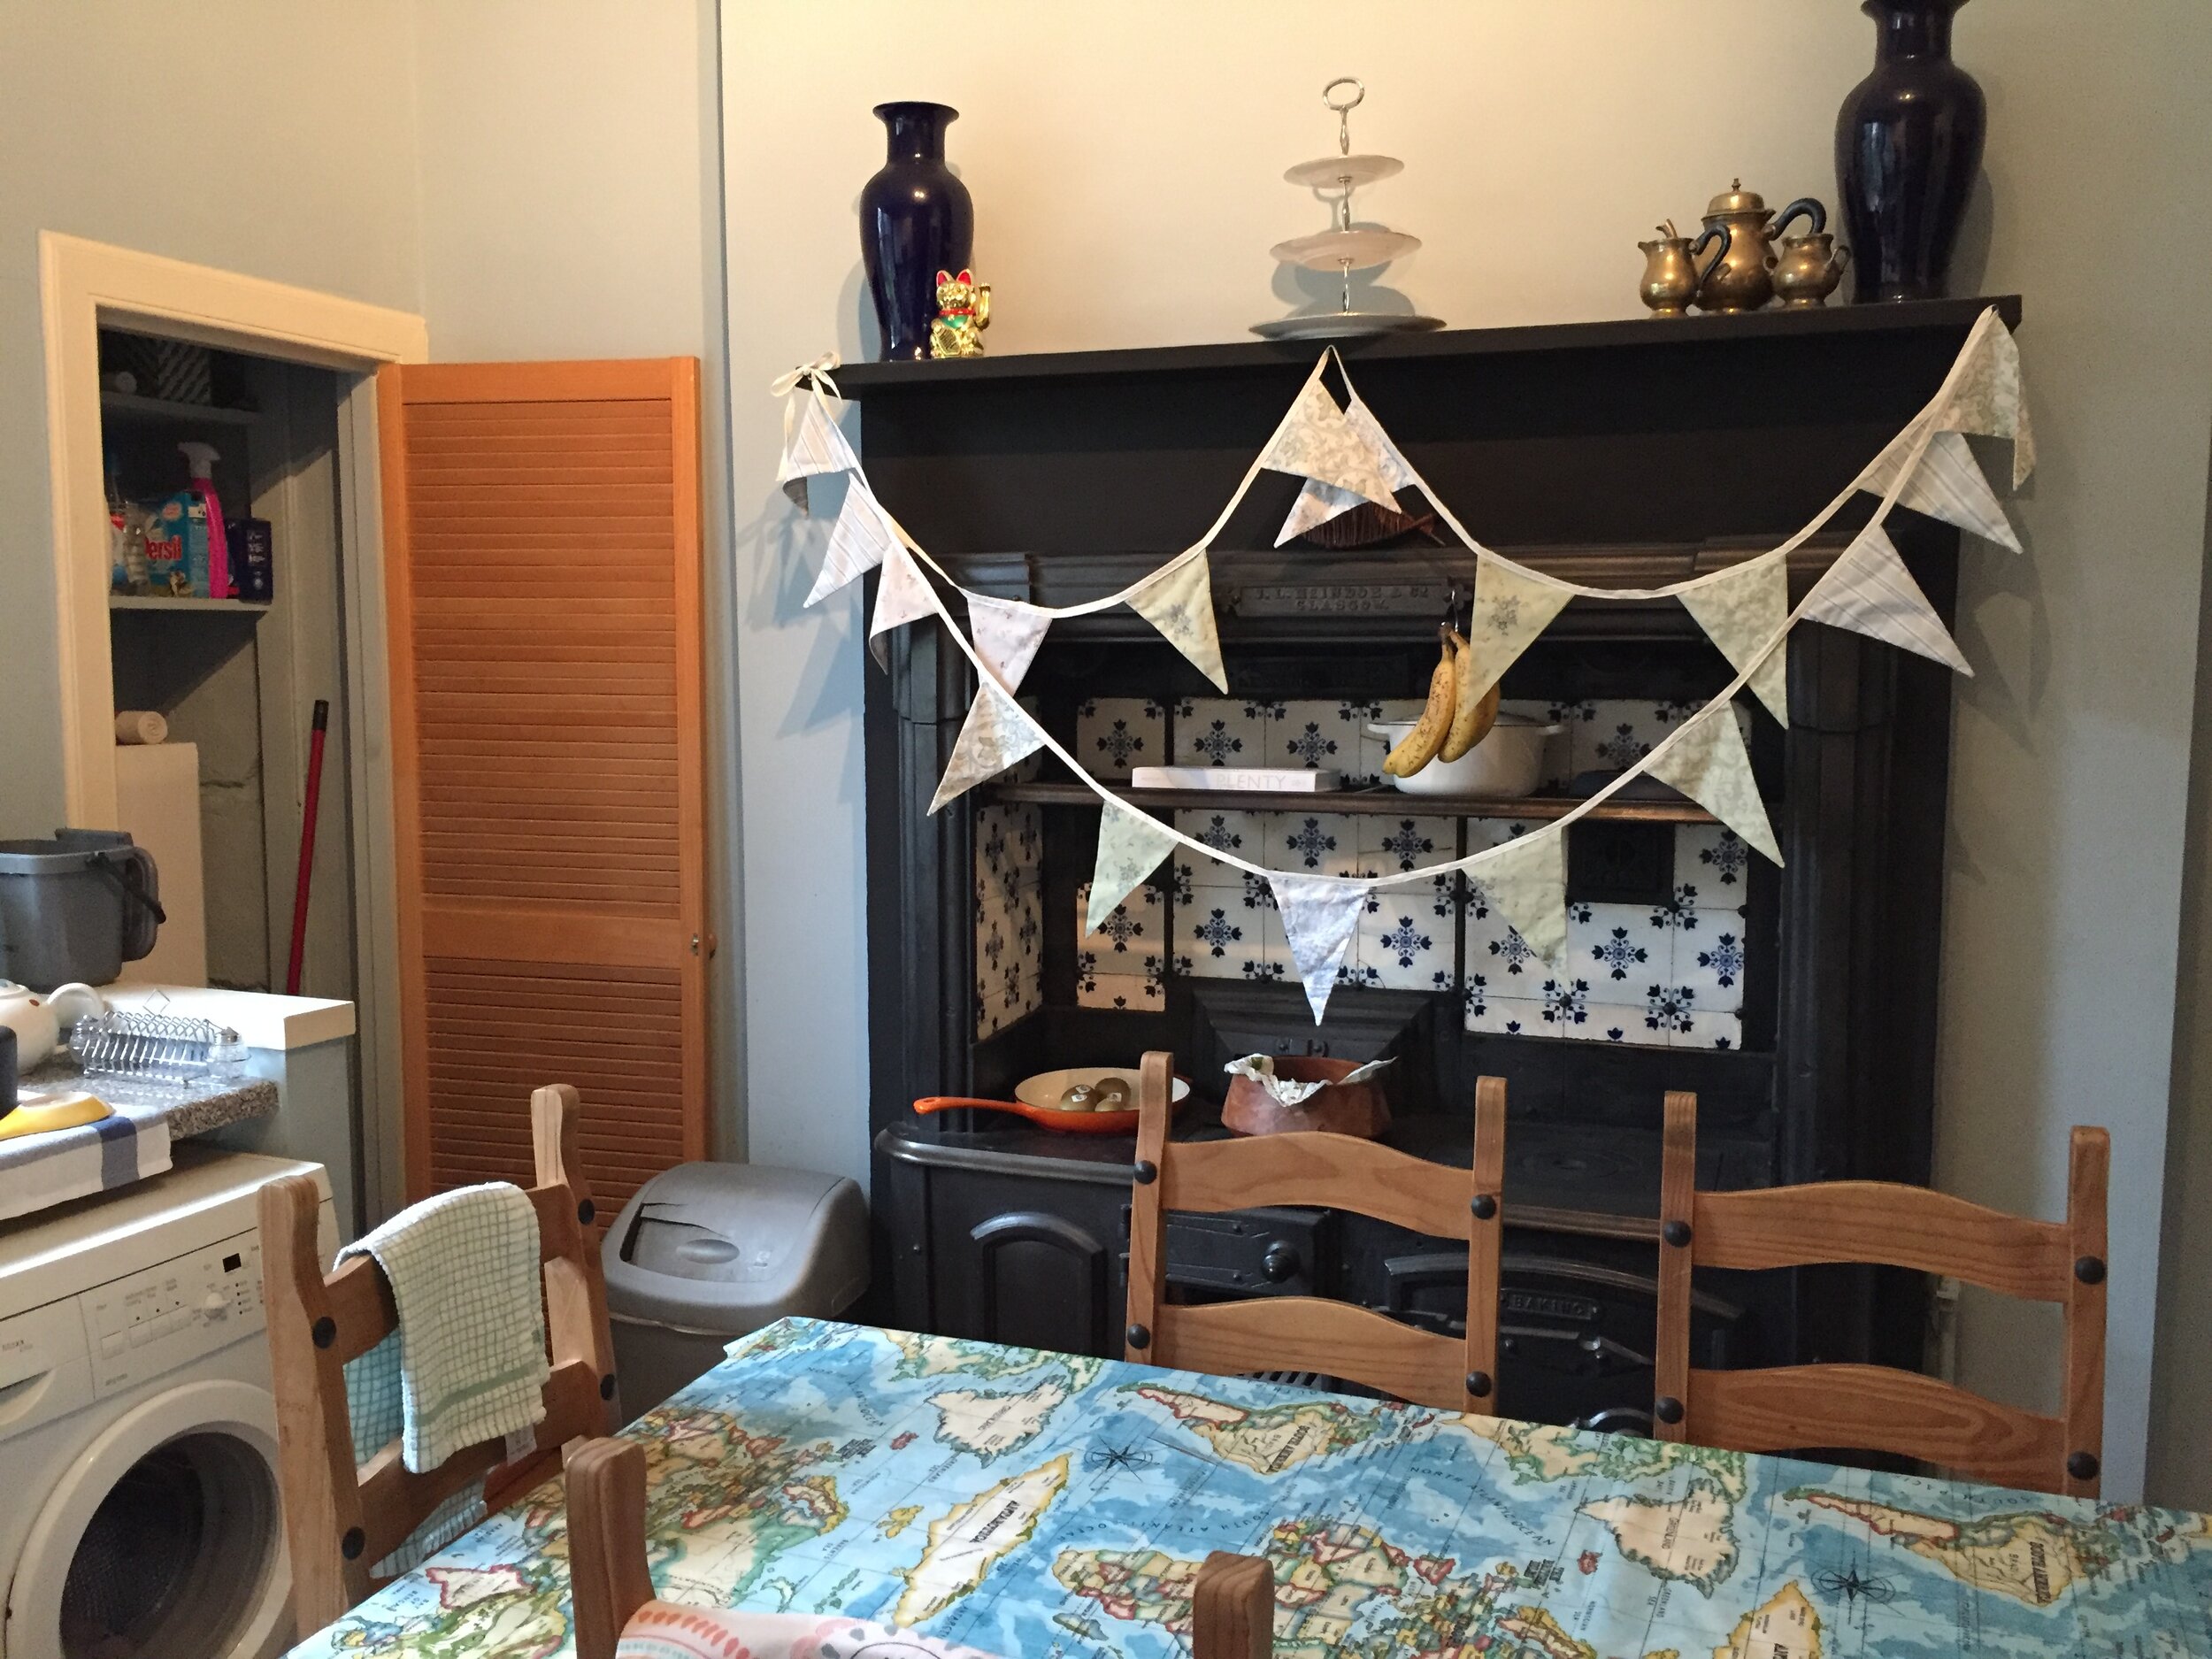
There was a utility room at the back of the kitchen, which was a waste of space really. We decided to knock through to create a dining nook. The wall was a stud but since the cornicing didn’t continue into the nook, instead of trying to match it, we decided to put in a faux beam to separate the two areas. We also knocked into a shelved cupboard from the hallway and blocked the door off from the hall. You can still see a line on the exposed brick wall from where the cupboard stood. The wall isn’t aesthetically perfect but it adds character and tells the story of our renovation.

Before
The ‘beam’ is actually just a veneer. The joiner cut three pieces of wood to size and just wrapped them onto the remaining bit of wall at the top. He cut out some grooves to make it look a bit bashed and more authentic. Then Graeme stained it the same colour as the flooring. Nobody ever questions the legitimacy of it, but now you know the truth! Such a fraud!

During…

After
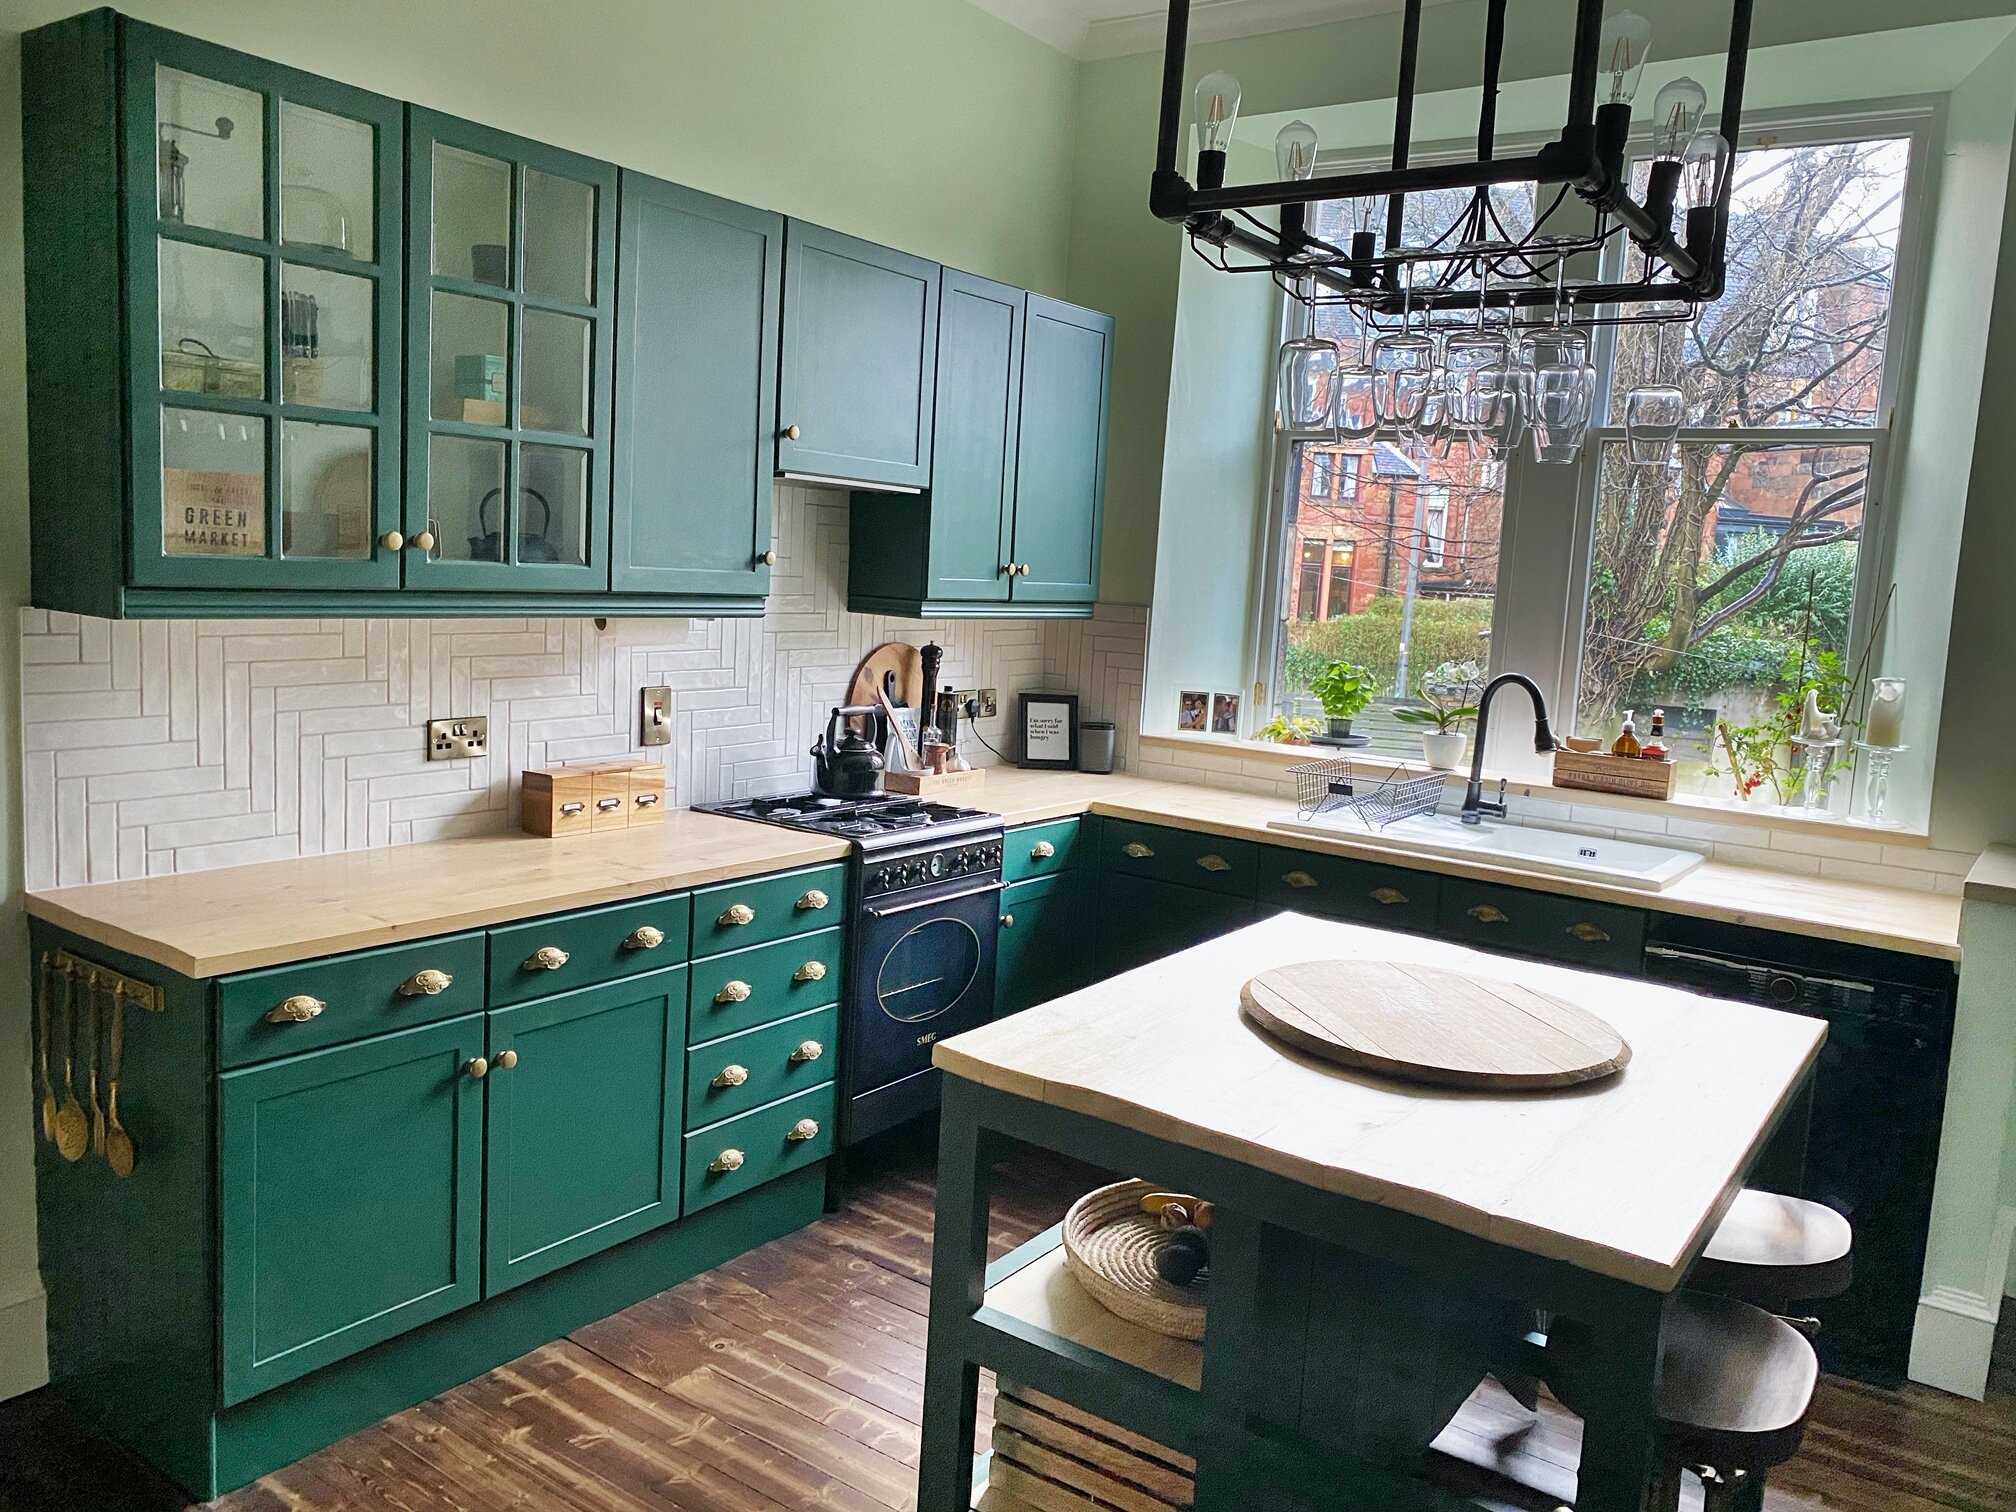
We’re lucky to have such a huge kitchen with so many original features. This range is probably the most impressive feature. At one time, this was probably a working kitchen and the range would have been used to bake bread for the whole street. The range isn’t operational now because Glasgow is a ‘Smoke Control Area’ meaning you can only burn smokeless fuel, which wouldn’t give off enough heat to run the range. It’s a lovely decorative feature and handy for storage too. We wanted to be sympathetic to the building we live in and design our dream kitchen based on ideas we love, but also something that was true to how they would have lived back when the flat was built. We chose dark colours, industrial elements and traditional accessories.
Before
I designed the island and our joiner built it from reclaimed wood and scaffolding boards. I based the measurements on the ideal spacing between the furniture surrounding it. I bought the crate drawers first then established the width based on three of those side by side, with a small gap between each for easy sliding. There are bar stools on the other side and I added a rail on one end.

After
The worktops, dining table, bench and island are all made of reclaimed scaffolding boards. They were sanded, smoothed with steel wool and then varnished several times. The joiner dowelled and glued them together to minimise gaps but the boards are still wonky. Personally, I love the imperfections but if you enjoy clean lines then this one is not for you! We replaced the tiled splashback and the handles on the kitchen cabinets. It looks like a completely different kitchen but all the changes we made were minor and we only spent around £5k, including materials, labour and appliances.

Before
The original wooden flooring was sanded and stained in this dark colour. The walls were painted in a subtle mint green colour. The lighting was a bit of an experiment. I had seen a similar light in a restaurant but I didn’t have £500 to spend on one light so I decided to make it myself. I did my measurements, drew a little sketch and then ordered all the components. I put the pipe structure together myself and added the wine glass racks, but the electrician wired it up for me. The light above the dining table was originally six individual ceiling lights which were wired into one ceiling rose and wrapped around a pipe bar.
After
My work is never done as far as interiors go! I want to add a rail above the window to hang some plants from, so watch this space! I need to find some plants that like to be in the light, humidity and look great drooping from a hanging planter. Recommendations welcome…