How To Make Candles from Recycled Wax
If, like me, you can’t stand waste then you’ll love this tutorial. This is candle making for your inner eco warrior! I found myself staring at a used up donut candle, which was sitting on the coffee table. It was beautiful when it was lit and functioning but after the wick ran out, there was so much leftover wax! Not knowing what to do with it and not wanting to throw it out, I did some research into recycling wax. Of course, that turned into an experiment and finally a blog post. So, if you want to make new candles out of your old ones, here’s how…
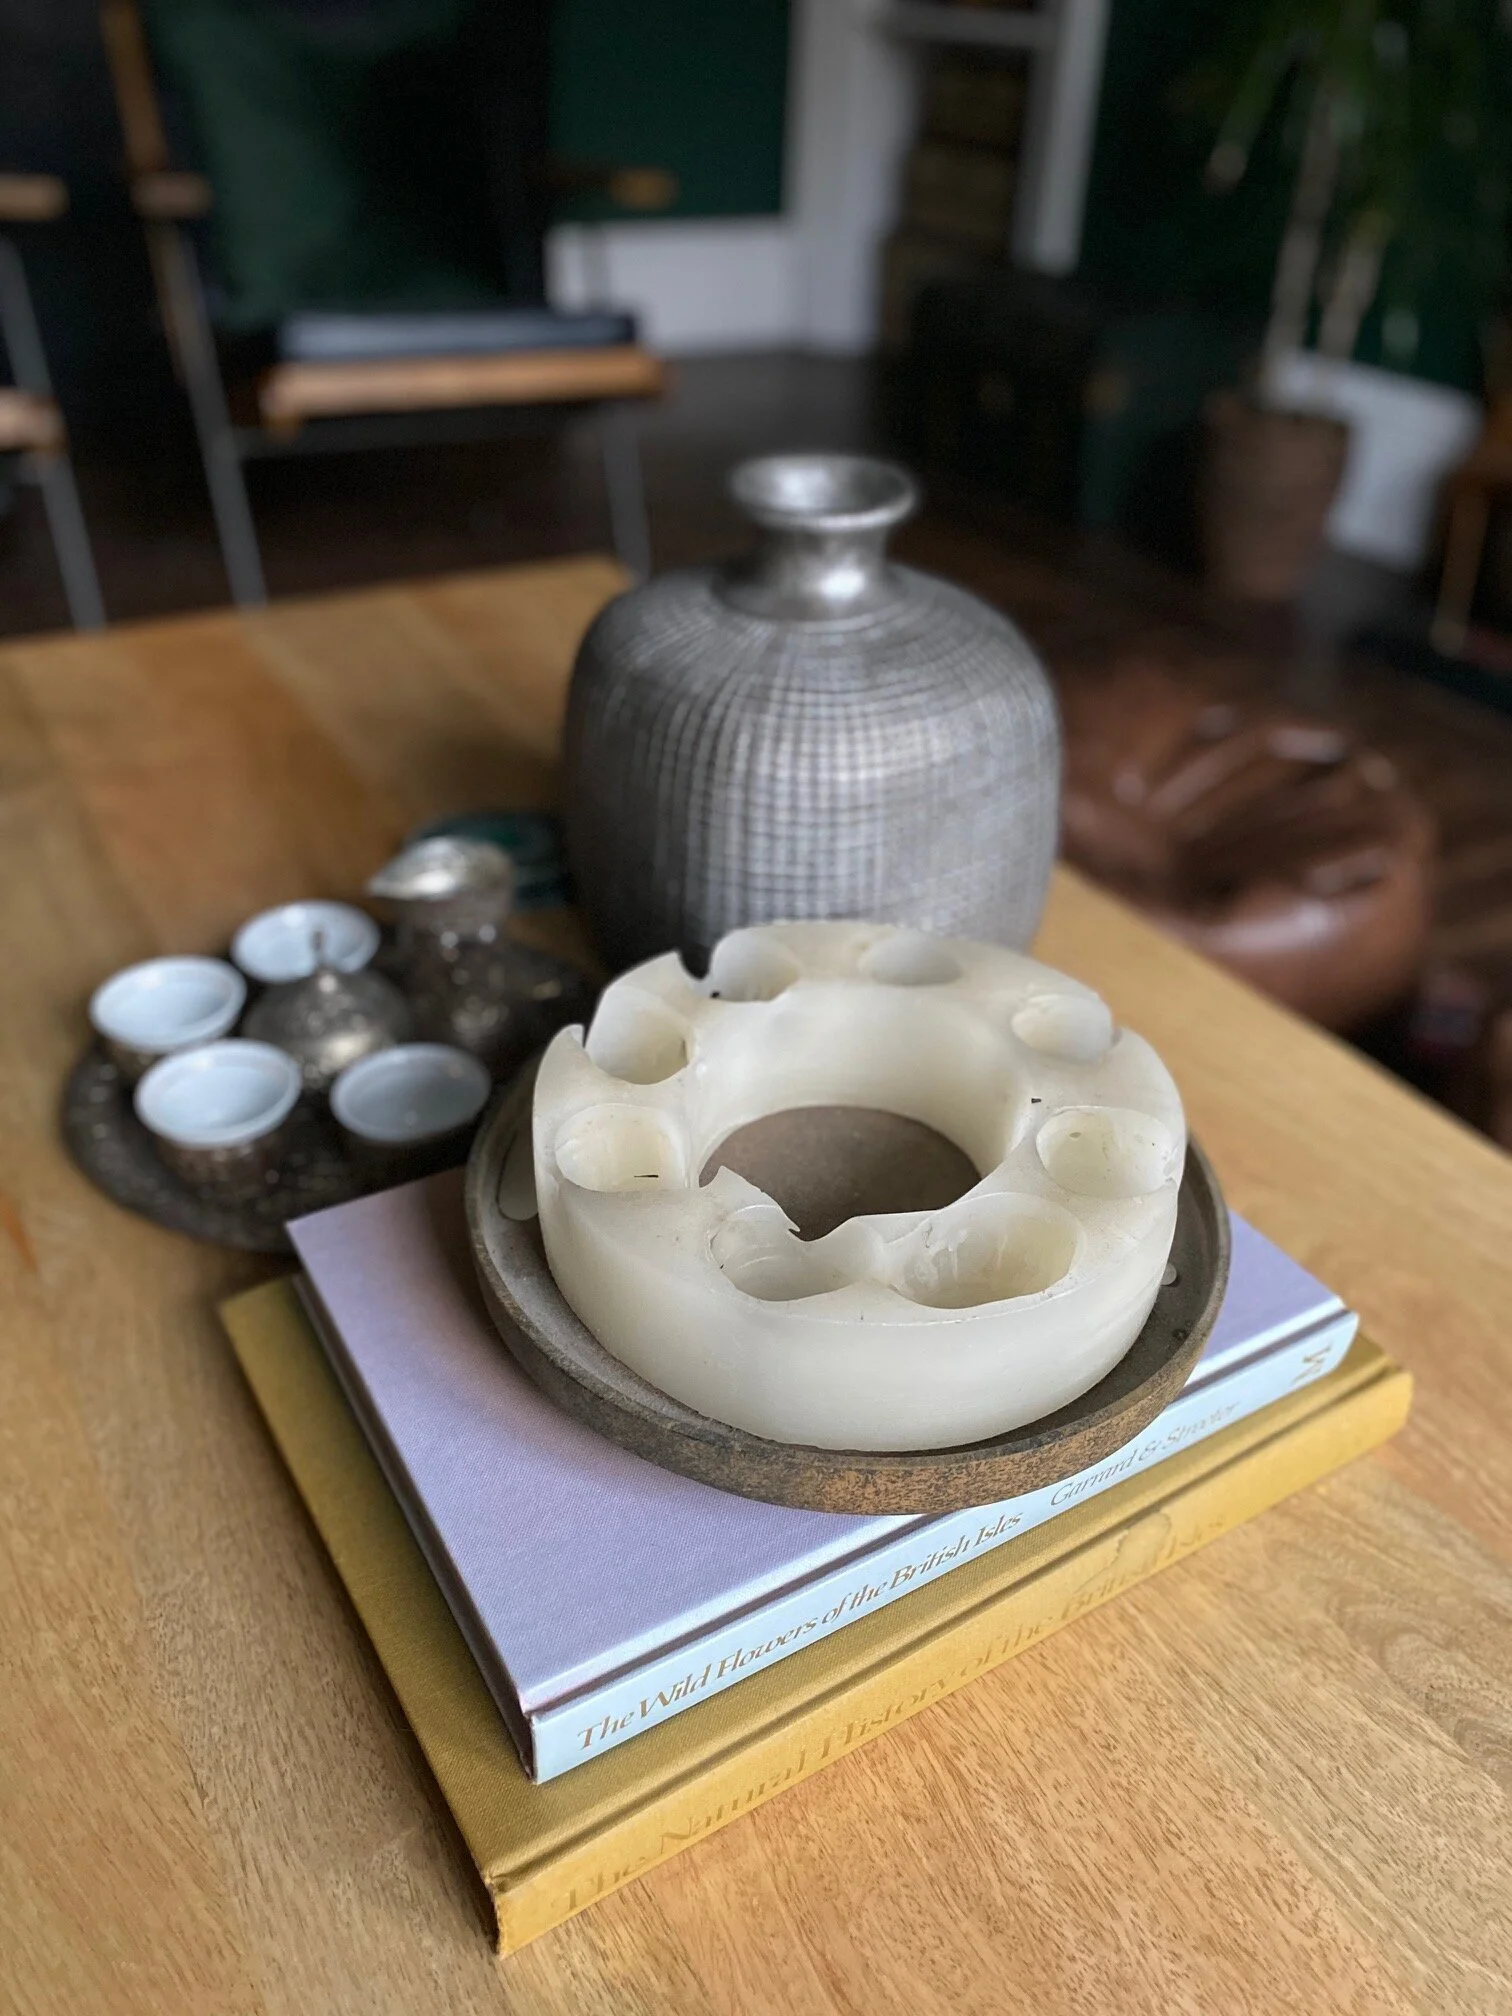
Before
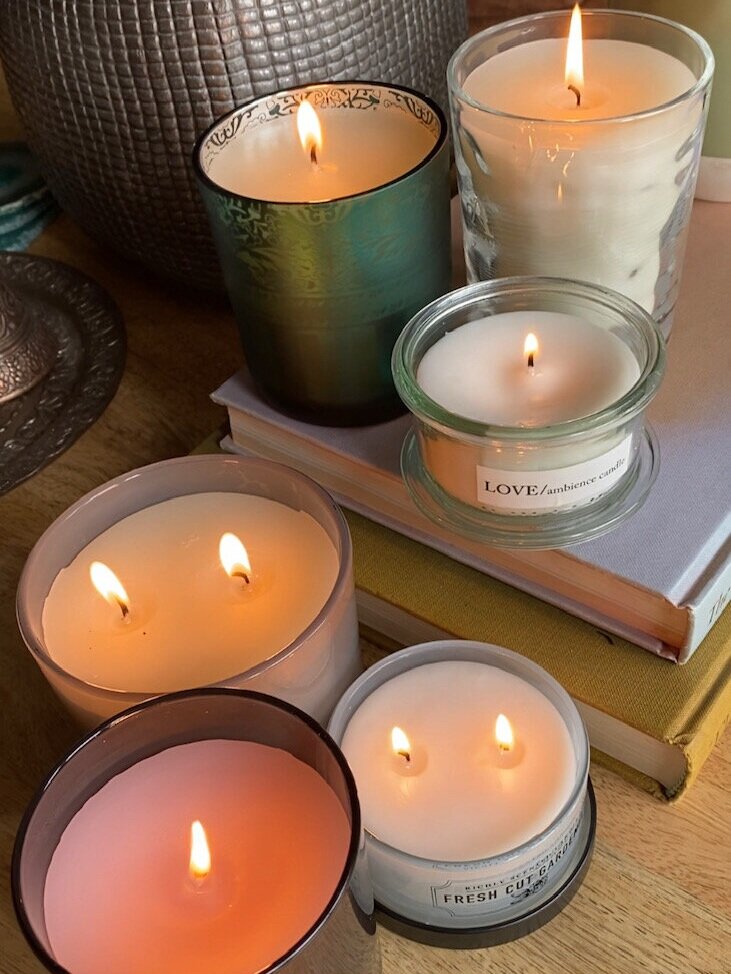
After
You will need:
Medium pot for boiling water
Small pot or bain-marie, preferably one that has a pouring mechanism
Containers of choice to hold candles – these can be decorative or just clear glass
Leftover wax from used candles
Wicks
Double sided stickers
Wick positioning tool or skewers or cocktail sticks
Scissors
Tweezers
Optional:
Candle dye flakes
Essential oils
Candle making kit – includes wicks, stickers and a wick positioning tool
There is no need to invest in thermometers, scales or expensive candle making equipment. I bought these wicks a few months ago with the intention of trying this out. So, other than wicks, just work with what you have. I have included affiliate links to the items I did buy.


Method:
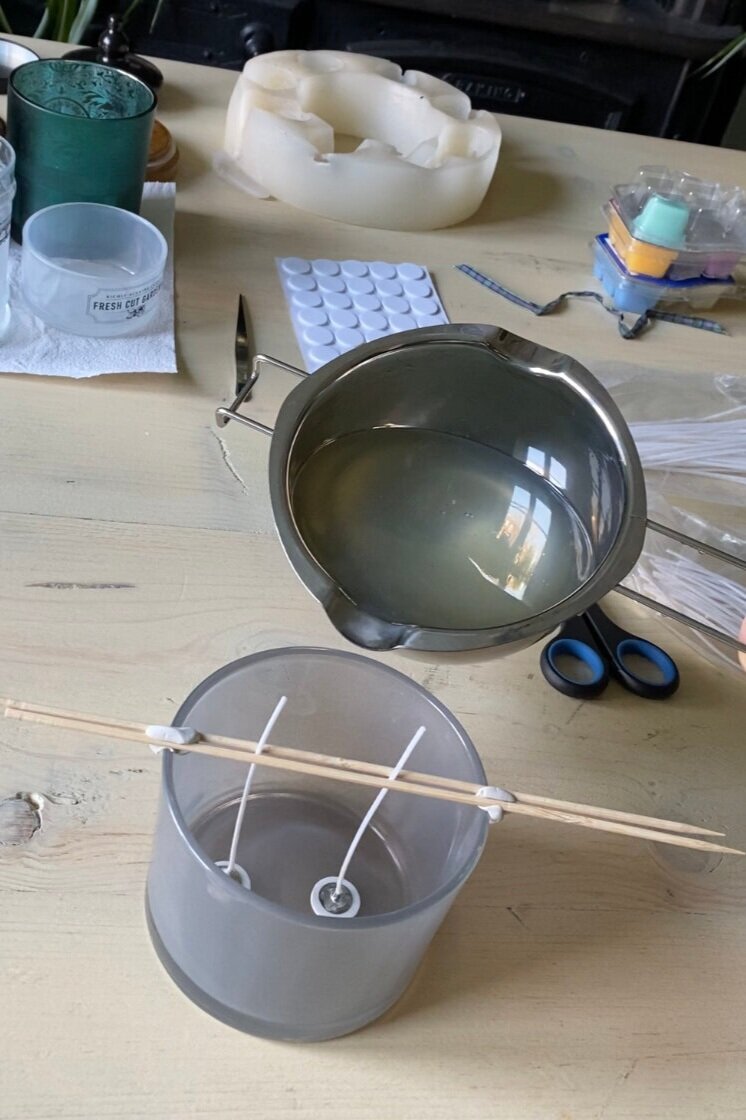
Fill a pot with water (about 2 inches deep) and bring to a boil. Turn off the hob and place your old candles into the pot to melt. Using tweezers, remove the metal wick holders and any leftover wick and matchsticks (there’s always bits of matchstick in my candles!). Then, pour the leftover melted wax into your smaller pot. Repeat this process for each old candle. You can use gloves or tongs to remove the candle from the pot if it’s too hot to pick up. Note: I used a stainless steel melting pot with a hook on the front to prevent it from sliding away. I used this pot for melting chocolate and since this is the same concept, it does the job perfectly. If you don’t have one of these then a bain-marie or a small pot that fits inside your medium pot will also work. You can always pour the wax from the small pot into a Perspex jug to make it easier for pouring into the candle holder.
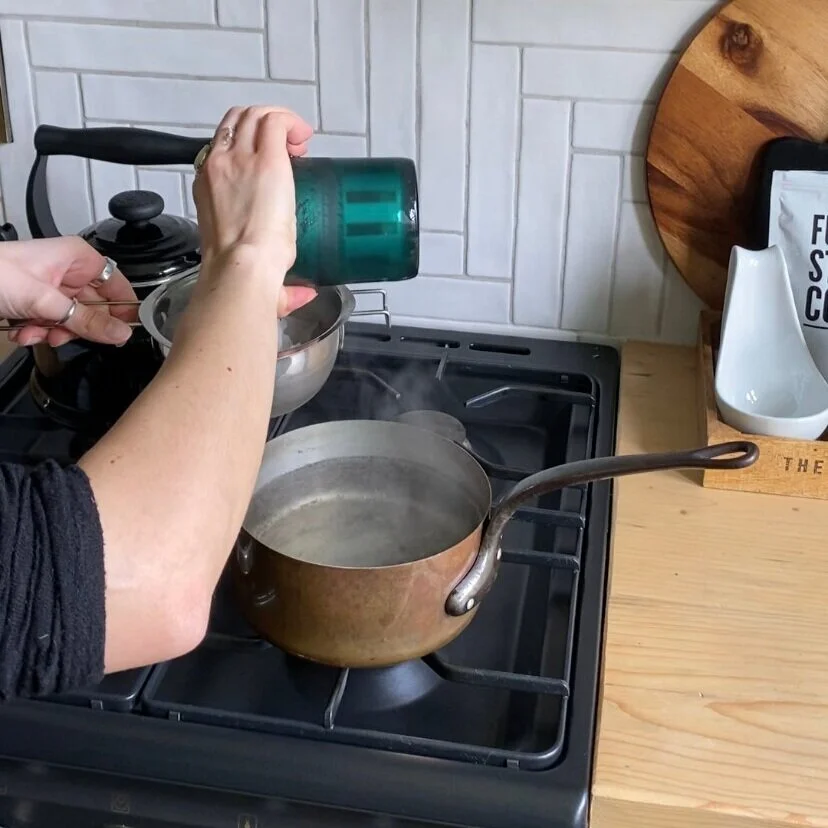
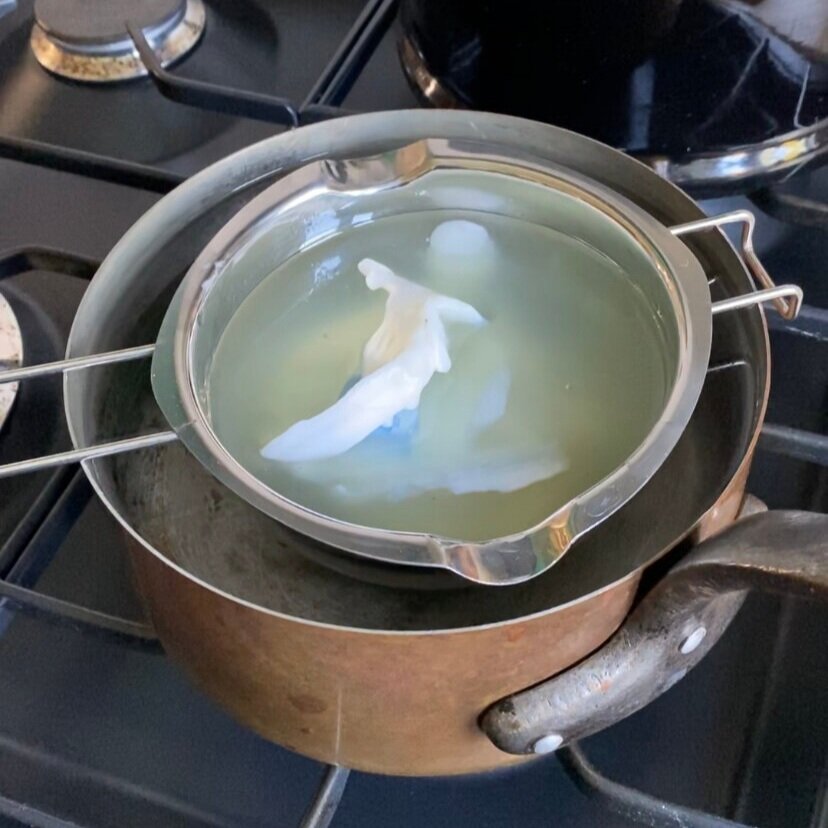
You can also add wax from pillar candles to your small pot. I melted down a couple of pillar candles that were no longer functional, plus my large donut shaped candle, which I had to cut up so it would fit into the pot. Add wax to your pot gradually. Use your common sense and make sure the pot doesn’t overflow. Turn the hob on and off intermittently depending on the rate at which your wax is melting. The hot water should be enough to melt it all, but if it starts to cool down and you see the wax isn’t melting down then just turn the heat on again until the water starts to simmer. If the water starts to evaporate inside the medium pot, just top it up.
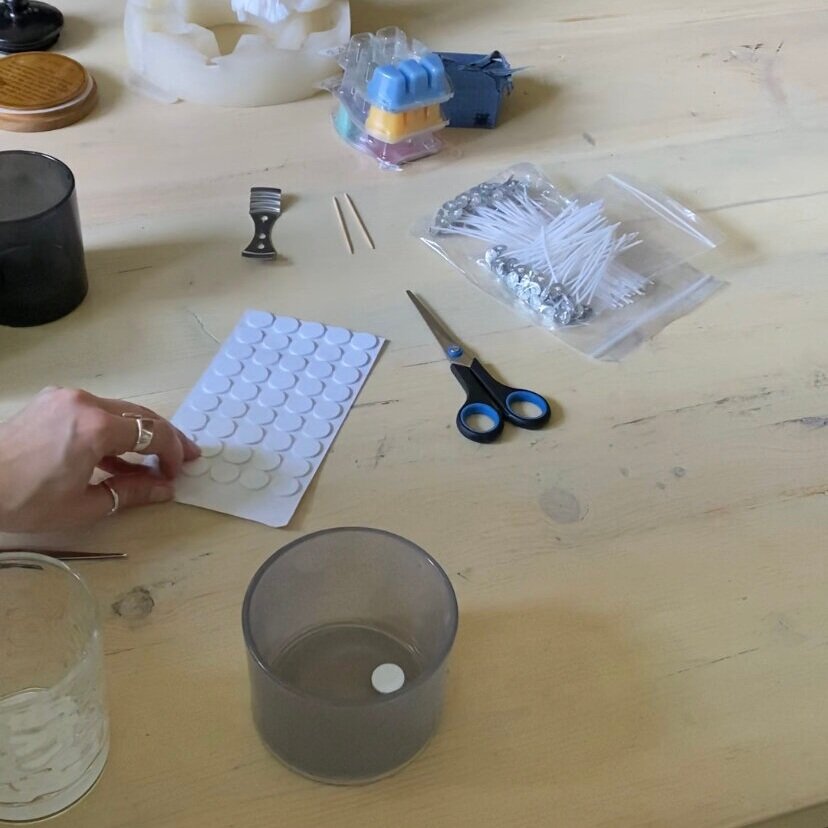

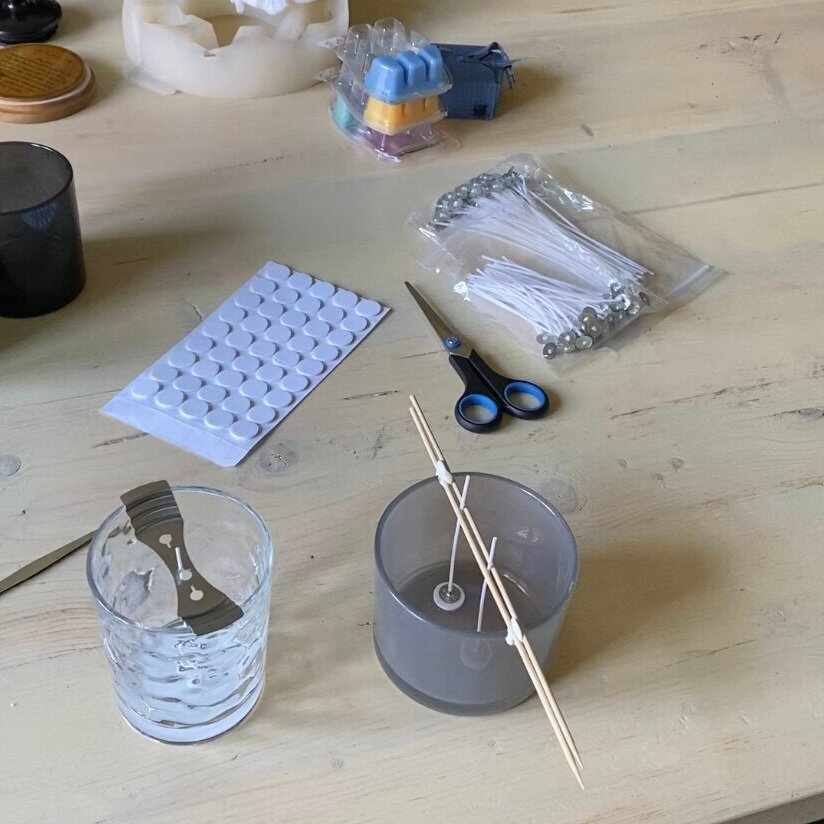
While the wax is melting, prepare your containers. If you’re re-using your old candle holders then give them a good clean. Make sure they are dry before sticking your wick down. Use double sided tape or stickers and place them inside the container in any position you like. You can place it in the middle or add two or three wicks. I used one for the deeper candles and two for the flatter, wider ones. This can be fiddly! If you’re using stickers then it’s easier to remove both sides of the backing first. You can use your tweezers to position the wick more accurately and stick it down properly. Note: Whichever type of container you decide to use, make sure it’s compatible with heat, otherwise it can shatter. Not everything can be made into a candle. In the name of upcycling, I am only reusing old candle holders.
Use a wick positioning tool (or some cocktail sticks, skewers or similar) to position the wick so that it’s upright and pulled tight. If the wick droops then your candle won’t burn properly. You can use blu tack or tape to stick your skewers together, then just slot the wick into the middle.

Once the wax has fully melted, you can add any extras at this stage. If you choose to experiment with colour and scent then start by using small amounts and building up quantities, if required. Too much dye or essential oils can affect how well the candle burns so less is more. I put a cube of wax melts into each batch of wax I melted. This added enough scent and colour to give an even burn. Some of my extra pungent used candles still had significant amounts of leftover wax in them which was, therefore, enough to give off sufficient scent. This step is very much personal so get creative with it and put your own mark on your candles!

Set your candle on a flat surface somewhere out of the way. Allow the wax to come down in temperature slightly, then pour it into the candle holder. Make sure your wick is still in place and then leave the candle to set for 24 hours before lighting.
I checked on my candles after a couple of hours and noticed some pooling in the middle of a couple of them. I just melted some extra wax and topped it up. Make sure you fill the gap and also cover the whole surface in a thin layer of wax. This didn’t affect the burn at all when I tried it. Not sure why it happens either. Note: Any wax you don’t use, just hold onto it in a separate container to re-use again. I keep leftover wax in my melting pot because I don’t use it for anything else now.
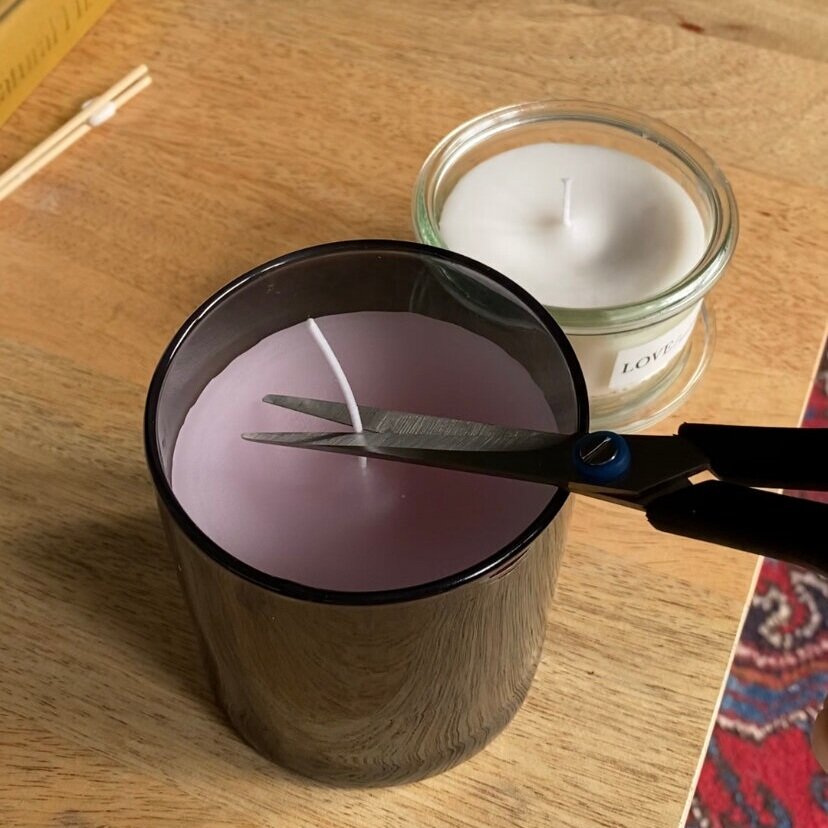

The following day, once your candle has fully set, trim the wick with either scissors or wick trimmers. If the offcuts are a reasonable length then you can save them up and put them into one of those little metal wick holders to create another functioning wick. And that’s it! You’ve got a recycled DIY candle that’s easy on the eye and the earth!
I hope this inspires you to recycle any redundant candles you have lying around, instead of throwing them out. Let me know if you’ve tried this in the comments!