Home Transformation - Unlucky For Some
When Graeme and I decided to move in together we vowed not to buy the first place we viewed, but lo and behold, it happened! As soon as we walked through the door, we fell in love with the place. The purple kitchen, the grim bathroom and the smell of dampness didn’t put us off. The apartment hadn’t been lived in for over a year and the renovation seemed never-ending but we eventually created a home that we can still enjoy to this day.

Before

After
We lived here for two years before we moved to Glasgow. After my mum passed away, my dad wanted to live closer to my sister and me so, he moved into this flat. When we helped my dad move out of the family home, he only brought a desk, a coffee table and some clothes with him. We didn’t take any furniture with us when we moved to Glasgow so the flat is, pretty much, as we left it.
Before

After
We bought number 13 as ‘non-believers’ but, the challenges it brought, were enough to make anyone superstitious! We laugh now, but at the time, it was a renovation nightmare! We were half way through renovations and the upstairs neighbour let a bath overflow. The water was leaking through our lights in the bathroom and pouring down the walls in the kitchen. This was the first of six leaks from upstairs, within six months. We had to replace ceilings, re-plaster and re-decorate. The wooden worktop in the kitchen suffered water damage but luckily, I managed to salvage it by sanding it and treating it.


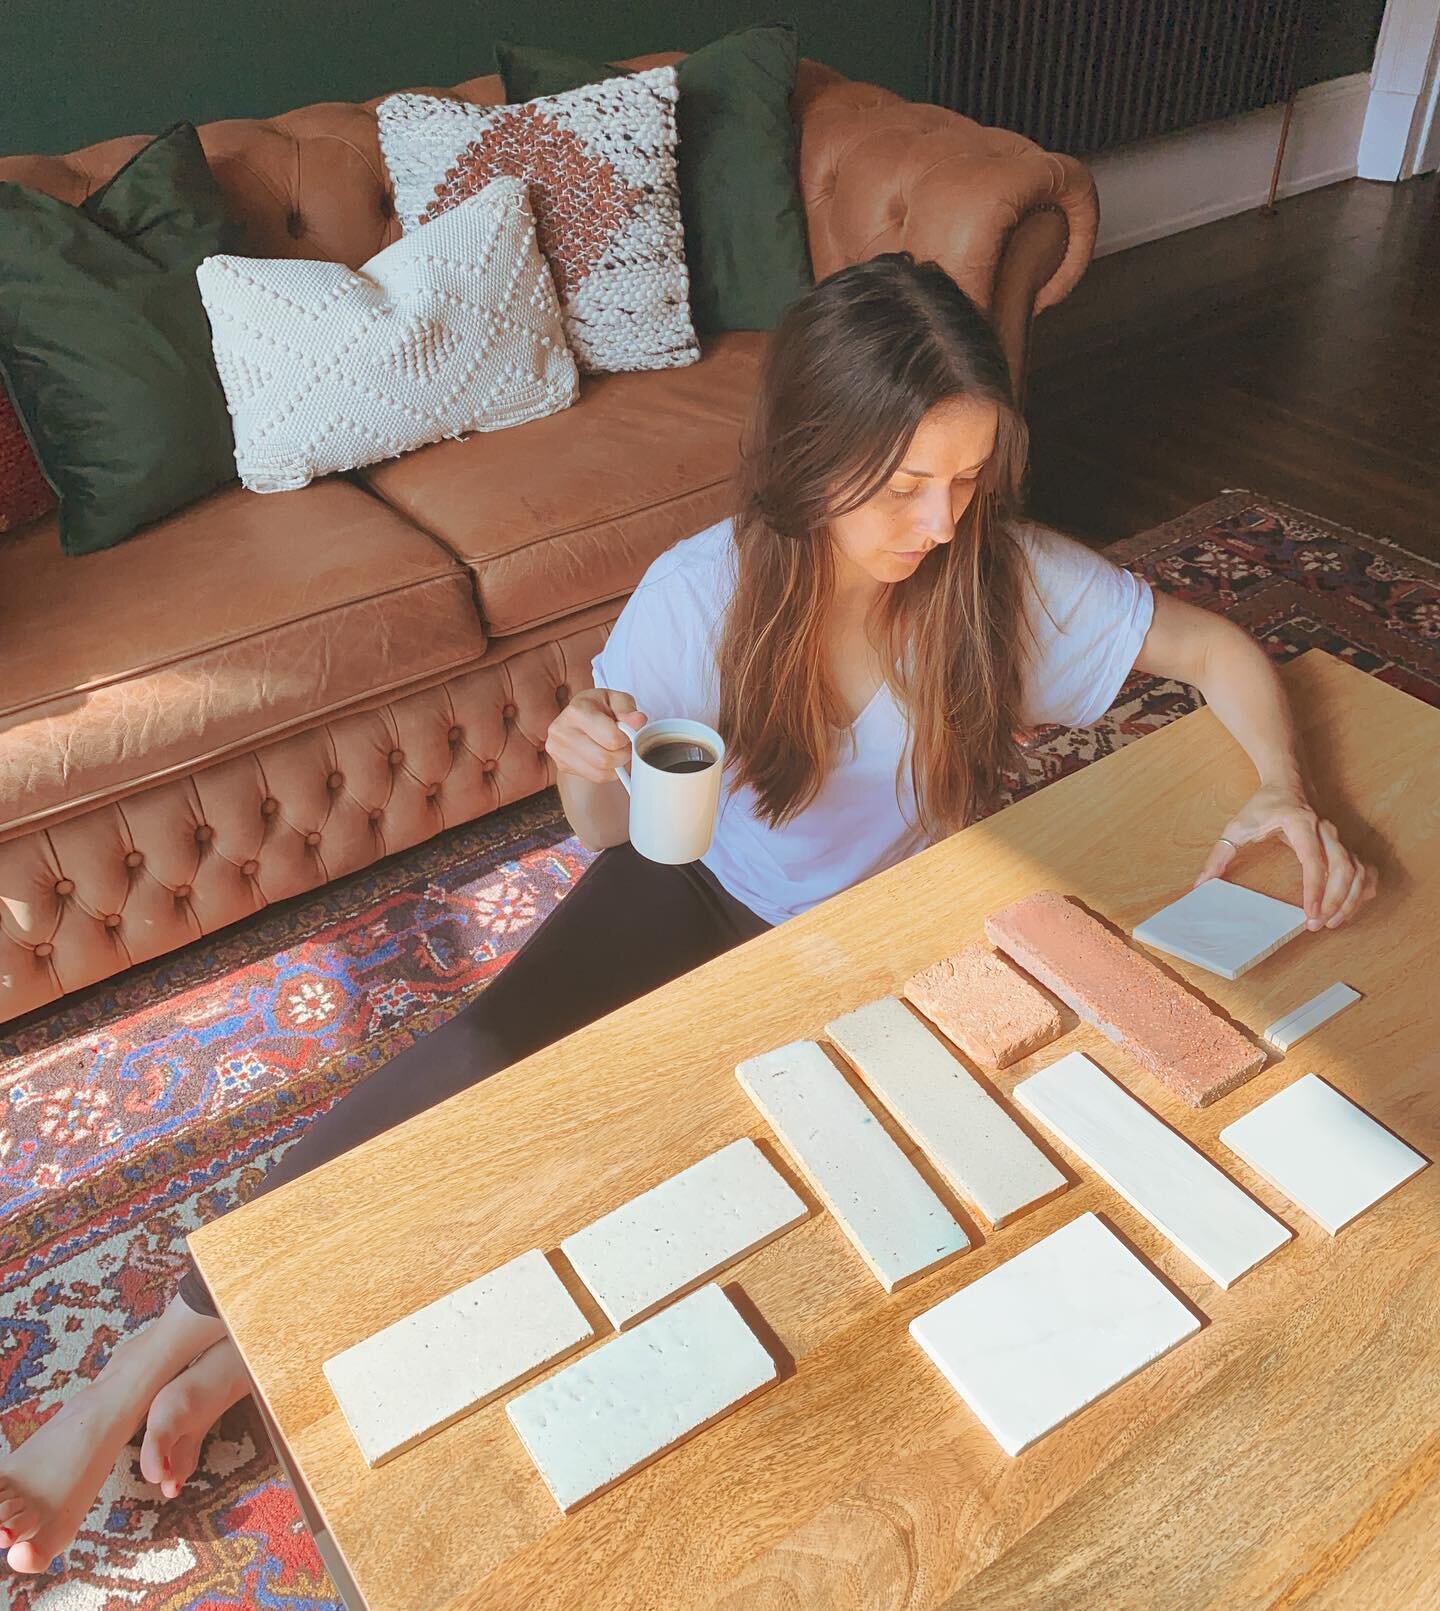
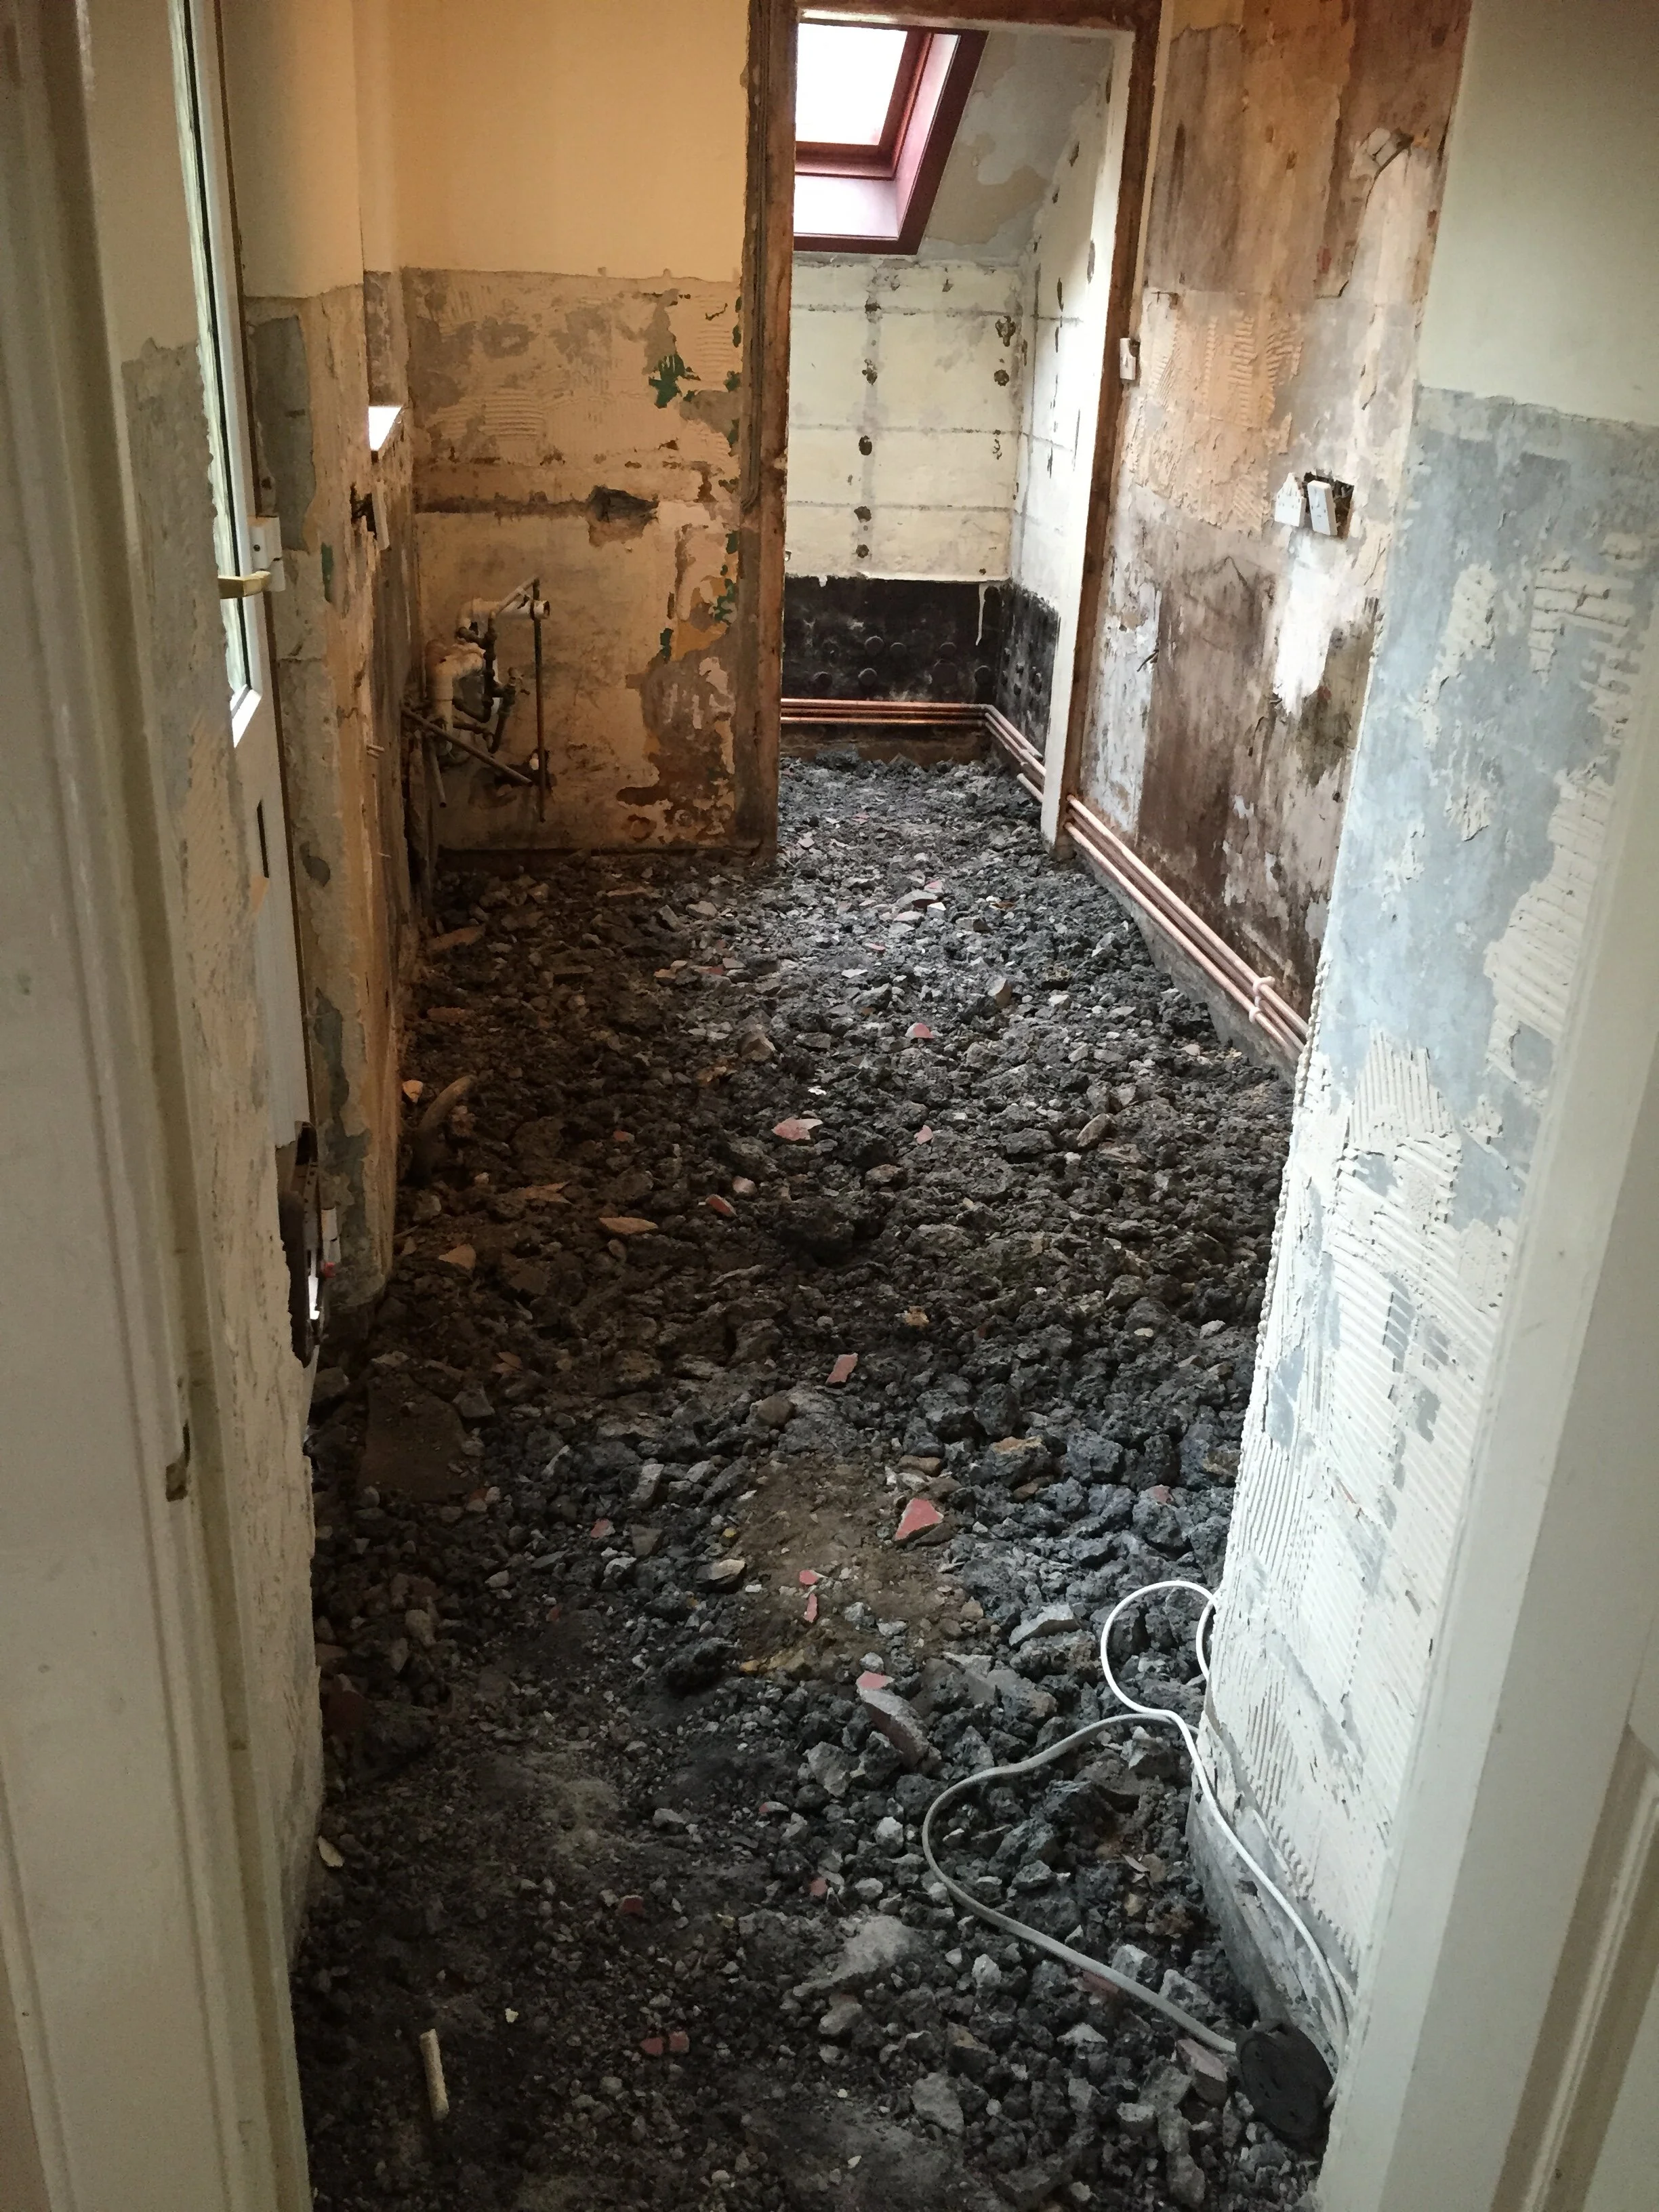
Once all the renovations were complete and we had been living there, comfortably, for a few months, I noticed an orange dust coming up through the floorboards. I didn’t think anything of it at first, but then, I did some research and figured out that it was likely dry rot. We had the specialists confirm and assess the extent of it. Turns out, the bedroom, bathroom and part of the living room were all affected. In order for the guarantee to be valid, we had to strip one metre of anything from the source. So that meant flooring, plaster, skirting and tile. In case you didn’t catch it, we discovered this AFTER we completed renovations. It was a living hell for several months and the work cost thousands. The thing with dry rot is that it eats away at anything in its way. Eventually, it will get to your foundation and your house can fall down! We had to replace original floorboards, which were not easy to match. We had to remove sections of joists under the floor and bolt new ones on. We were very proud of being able to salvage the original tiles in the bathroom but, after the rot, we had to get rid of them. I couldn’t find any photos of the bathroom post-reno/ pre-rot but from the before photo, you can see the original tiles. With the work being an added expense, we couldn’t afford to splash out on Victorian tiles so I opted for these inexpensive hexagonals instead. There is a sub-floor in the bedroom and the living room, enough to climb into, so that was easier to treat. In the bathroom, however, under the tiles was concrete. So, we had to remove all of the original tiles and dig into the floor. You wouldn’t believe how much rubble came out of this tiny room! Graeme dug it up himself and, I’m sure he’ll admit, completely underestimated the job! It was an experience we’d rather forget, but at the same time, a massive learning curve.

Before


After
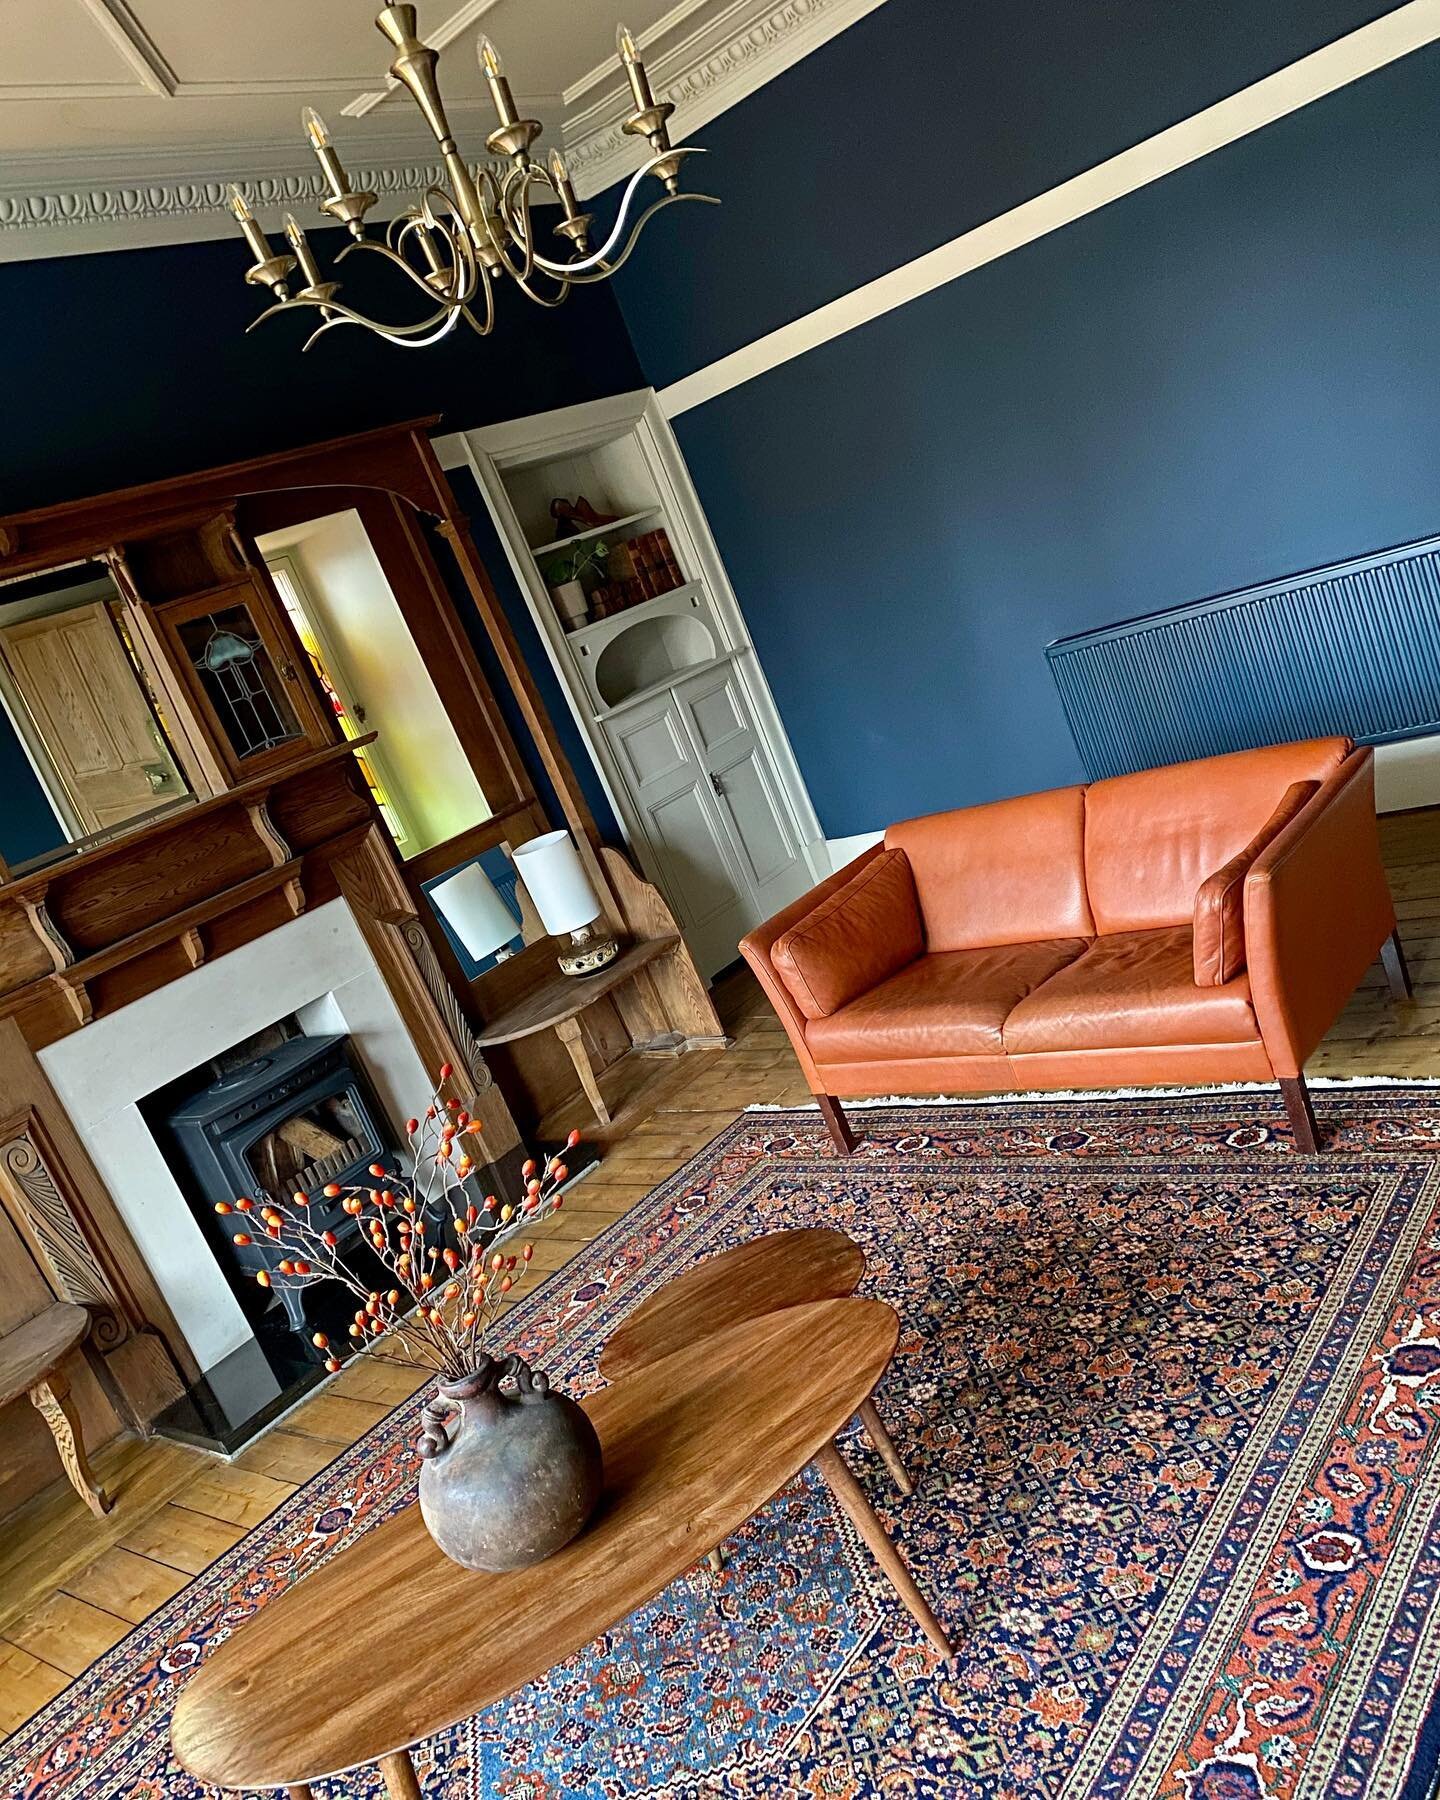
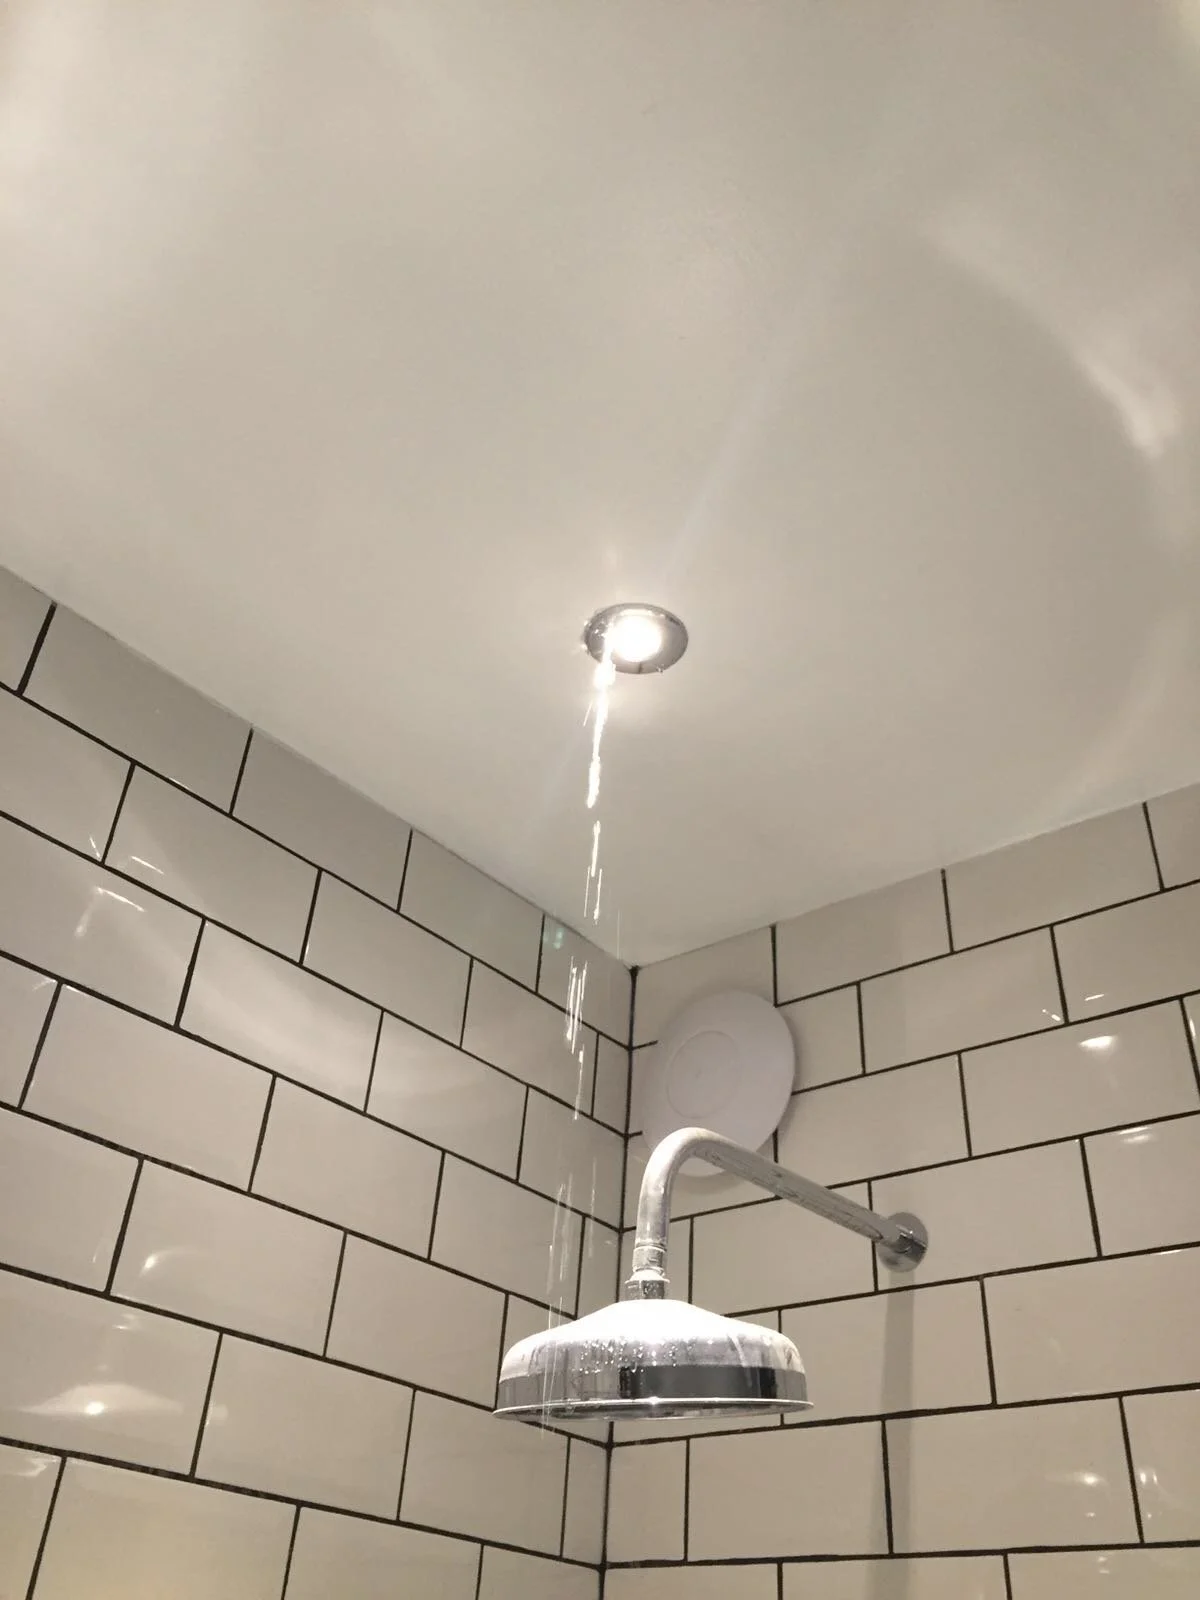
We replaced the bath with a double shower i.e. a shower head on each wall. In the hall, we cleaned up the original Victorian floor tiles and picked the wall paint based on one of the colours in the tiles. It’s an unusually wide hallway so we were able to fit furniture into it; including a piano (which was a Freecycle find) and a church pew (found in a salvage yard). I picked up the little side table from the side of the road, one of the neighbours was throwing it out. I made a feature out of a wall map poster. In case you hadn’t noticed, I’m obsessed with maps! I cut the poster up into 12 pieces and framed each one individually and recreated the picture, almost like a jigsaw.

Before

After

We played with the idea of moving the kitchen into a bigger room and re-shuffling the layout, but we decided to think up some clever storage solutions instead. Ultimately, we wanted two bedrooms so we created one bedroom at the front and one to the back. We kept the kitchen in the same place and converted the dining room into a living space with a dining nook. The plan was to, eventually, build some decking out the back. My dad put that plan into action after he moved in. The kitchen has a back door which opens straight onto the decking. It feels like an extra room when the sun is shining. We have had many a BBQ out there.

Before

Before
During

After

After
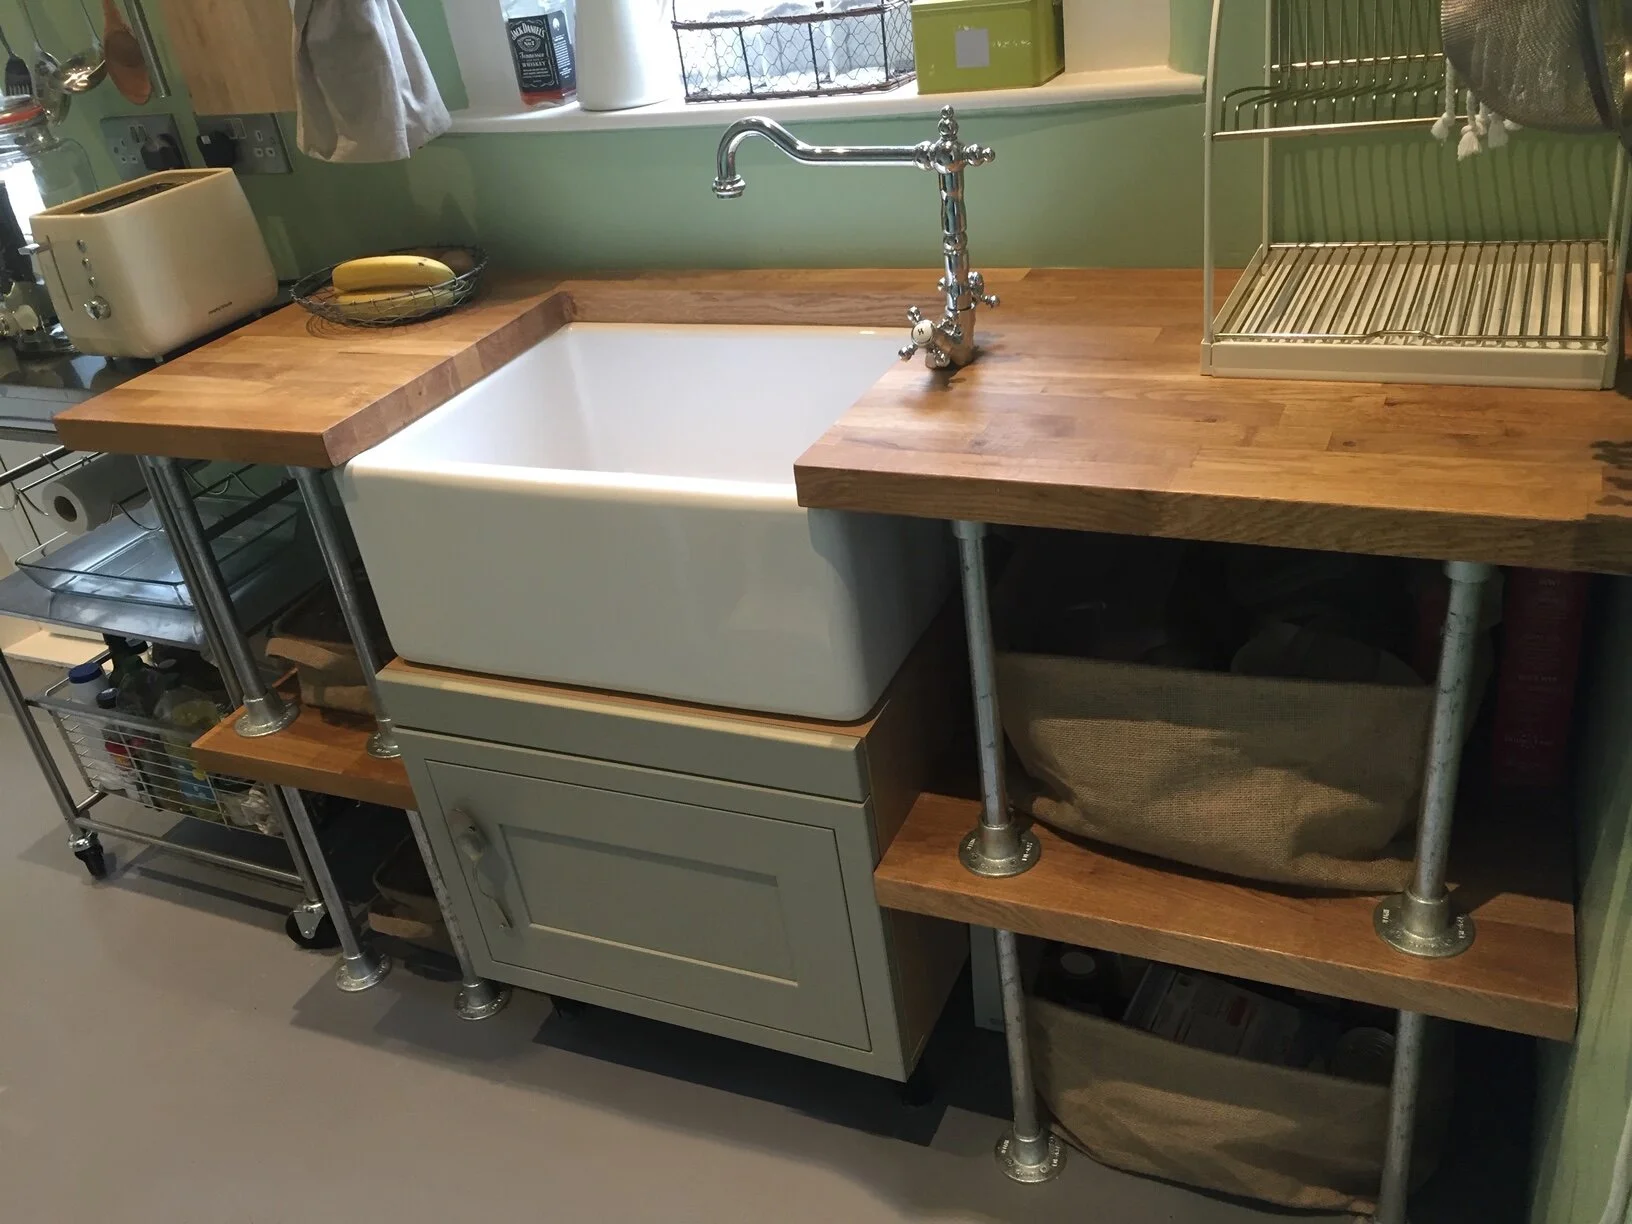
The kitchen floor was also concrete underneath. We wanted a polished concrete floor so we had to excavate some of the existing floor to get it level. See ‘during’ photo. We took down all the wall units to make the space brighter and added open scaffold shelving. The sink is mounted onto a cupboard and everything else is freestanding. I created some shelves around the sink with leftover worktop and used galvanised steel pipe to make legs. I also used pipe to make a curtain rail, shelf brackets and hanging rails. A PulleyMaid acts as a pot rack and the portable trolley can be wheeled in and out.


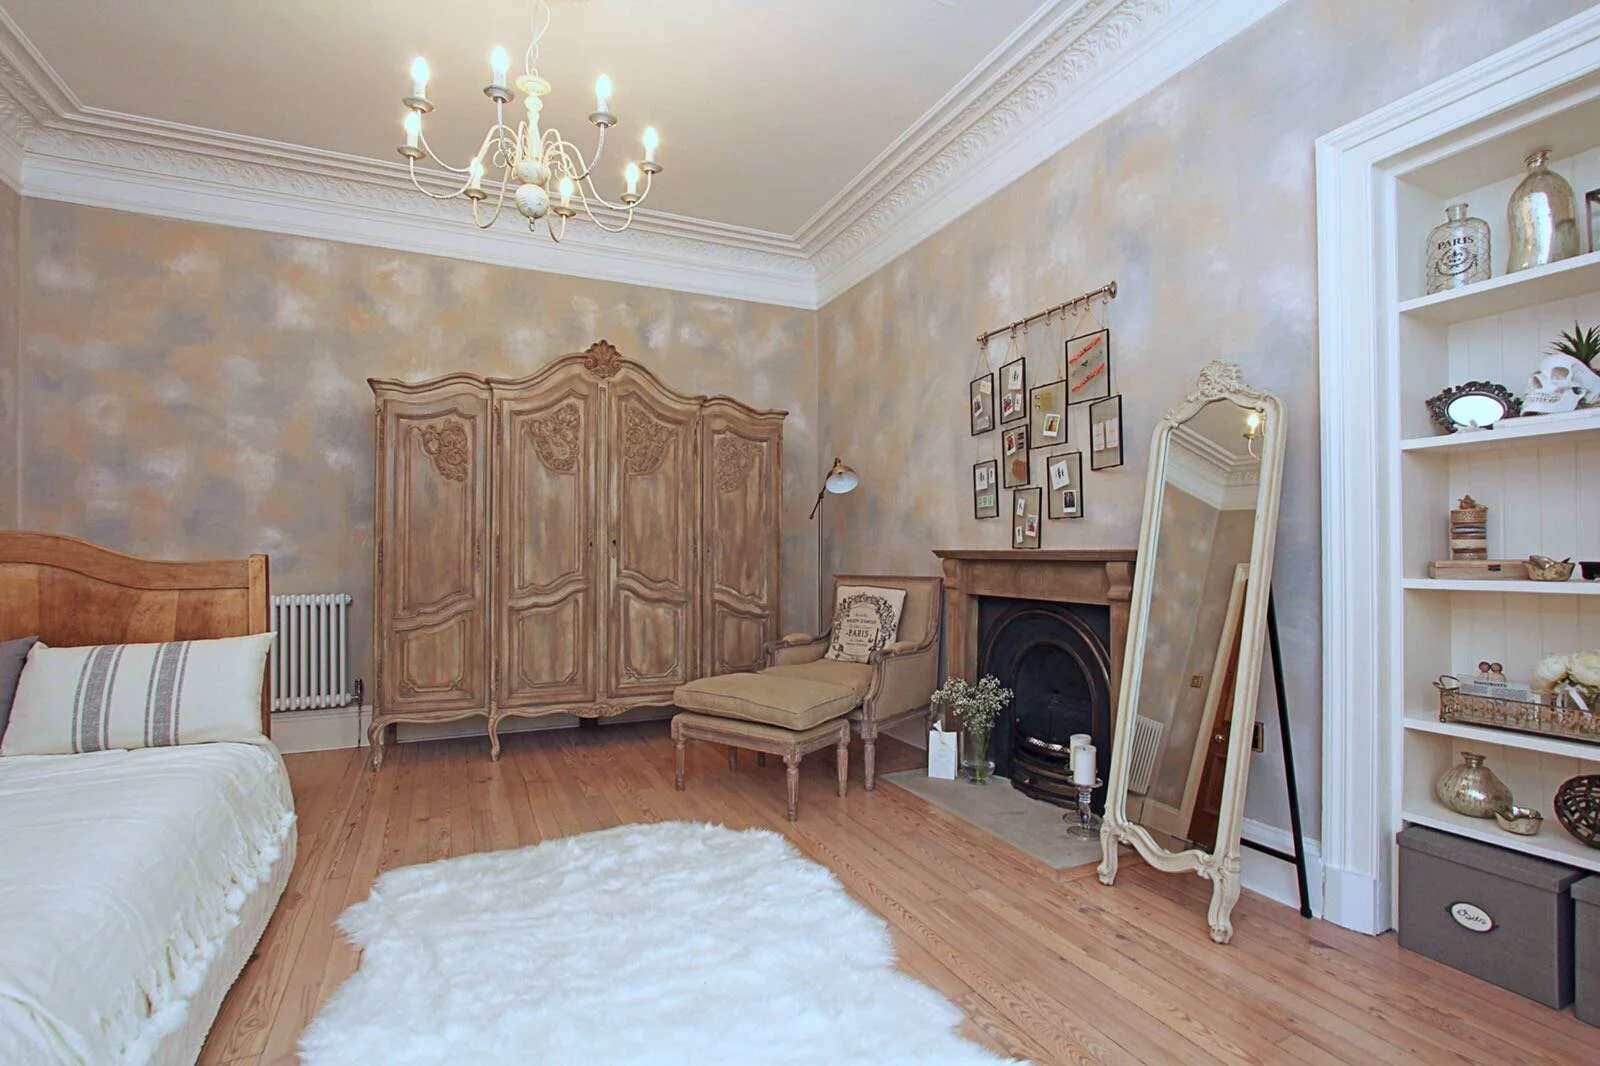
The front room acts as a bedroom, but also a cosy den to lounge in. I experimented with paint techniques in this room and finally settled on this ‘cloud’ effect. I achieved it by painting three different colours in stripes and then blending them by dabbing with a sponge. It was time consuming, but it’s a really effective way of adding texture to your walls just by using emulsion. I found the wardrobe and the fire surround on Gumtree and upcycled them using chalk paint and wax. The giant beanbag was an upcycle out of an old faux fur throw. We replaced all the mahogany windows with white ones and added shutters to the front.

Before
After
The back bedroom was my sister’s sanctuary for long enough so she picked the colour scheme and the crazy wallpaper. I upcycled a leaning mirror, made some cushion covers and a tall headboard to fit with the plum, mustard and teal colour scheme.
Before

After
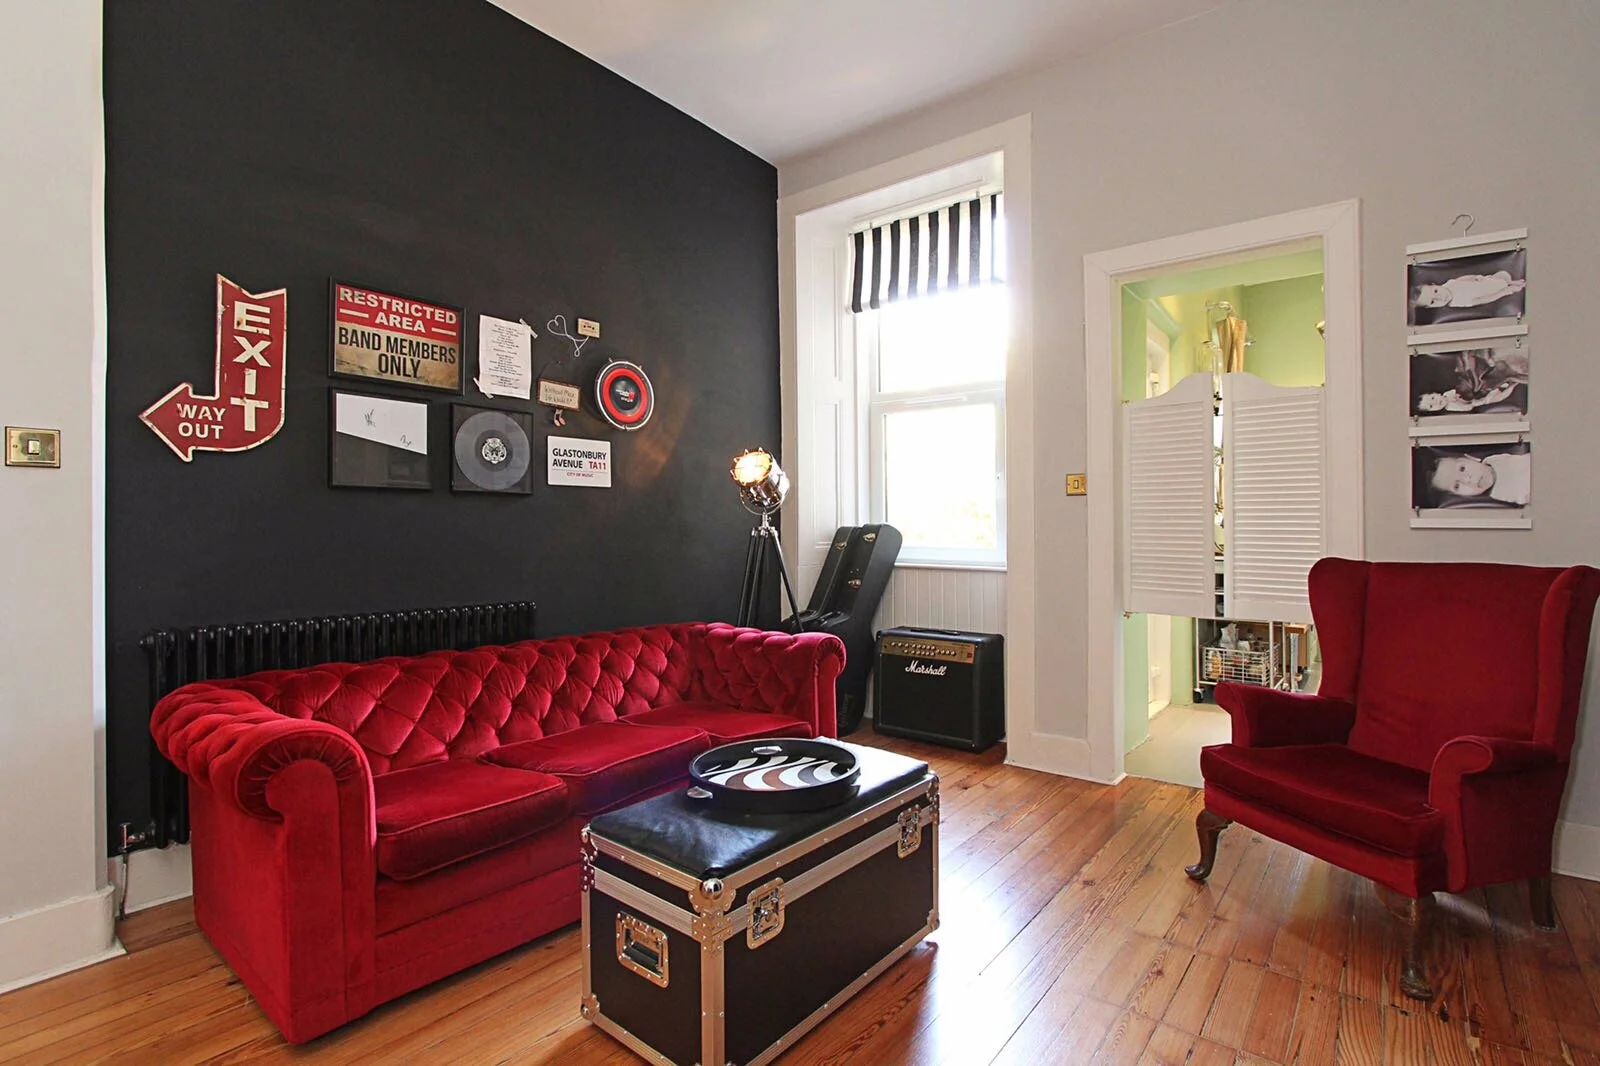
The living space has a music theme, simply because Graeme wanted to display his guitars, so I went hard! I drew a song sheet on the wall, across one corner of the room, just above the dining table. Then I added some brackets and back lights to add drama. Three of the chairs at the dining table are cinema seats and there’s a bench on the other side. The dining table base is an old sewing table with an Ikea table top. The fire surround was a Gumtree find, which I painted black. The sofa was also second hand; it had a frill trim along the bottom, which I pulled off. The red velvet matched the cinema seats and, once it was in place, against that black wall, it looked a lot less granny chic. I made the overhead light from a child’s drum kit and the coffee table is a travel case for music gear (to which I added an upholstered top). Even the tray on top of it is a tambourine and the blind is supposed to look like piano keys. Ok, so I went themey with the theme, so what?! It was fun!

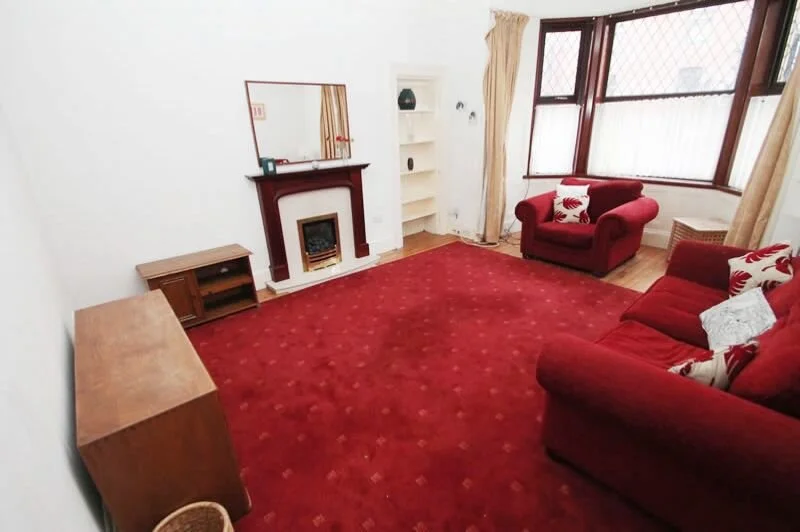
Before

After

Before
After
Finally, a few months after we recovered from the dry rot farce, we fixed up the front garden. We replaced the slabs with Indian Sandstone, added a privet hedge and painted the masonry and the front door. Graeme did a lot of labouring himself. We painted and fixed and made a lot ourselves, which is probably why it took so long. Not to mention the trials and tribulations in between, but hearing my dad tell me, on the daily, how happy he is there, makes it worthwhile. Just don’t ask Graeme about it, it’s still too soon…